DIY Easter crafts are complex. DIY original crafts for Easter: Interesting ideas for creativity
Schemes, instructions for creating crafts for Easter from pasta, cardboard, ribbons, salted dough.
Children, in turn, can improve the mood of loved ones or decorate festive table by making various crafts... A fun cardboard bunny or Easter basket is a great option for Easter. You need very little materials. Visit your hardware and office supply store in advance and get your essentials.
Materials:
- 2 packs wooden clothespins linen
- 1 plate made of cardboard or a sheet of cardboard
- Scotch
- Colored paper
- ribbon
VIDEO: Paper egg coasters
Instructions for making an Easter basket made of cardboard:
- Take a plate or circle of cardboard with a diameter of 22 cm and cut it along the entire circumference by 3-4 cm.
- Now fold the slices to make something that looks like a tray. Glue tape or a piece of paper along the rim with regular office glue. It is necessary to fix this nut.
- Glue the handle from a piece of cardboard. To do this, cut a strip 30 cm long and 4 cm wide.
- Now attach clothespins around the entire circumference of the rim. It is necessary that they fit snugly against one another. You should get a frame.
- Glue a wide tape along the length of the handle. Along the circumference of the frame from clothespins, also make a rim from a ribbon, tying a bow.
- Place straw or thin strips of green colored paper at the bottom of the container. It will be an imitation of grass. Place the eggs on top of the pillow.

 DIY crafts for Easter from corrugated paper and cardboard: schemes
 DIY crafts for Easter from corrugated paper and cardboard: schemes
  DIY crafts for Easter from corrugated paper and cardboard: schemes
 DIY crafts for Easter from corrugated paper and cardboard: schemes
 DIY crafts for Easter from corrugated paper and cardboard: schemes
 DIY crafts for Easter from corrugated paper and cardboard: schemes
Every woman has cotton pads in her cosmetic bag. They can be used to remove and adjust makeup and even make Easter crafts. Decorate easter basket you can use chickens from cotton pads.
Materials:
- Several cotton pads
- Yellow egg paint
- Red colored paper
- Wire
Instructions:
- Pour some dye into a bowl and add water. Dip cotton wool into the solution and place on a plate. Let the cotton dry completely.
- Attach thin wires to the bottom of the disc, shaping them into the shape of the legs. Glue the paws over with pieces of cotton wool and paint them red.
- Cut the scallop and beak out of red paper. Glue the eyes. You can cut the wings separately from a cotton pad and glue them to the body of the chicken.

 DIY Easter crafts from cotton pads
 DIY Easter crafts from cotton pads
You can make a lot of napkins interesting crafts... One of the most attractive is the Easter tree.
Materials:
- Packaging of blue or pink napkins
- Cute dry branch
- Wire
- Cigarette paper
- Paints
- Plastic pot
- Styrofoam
- Colored paper
Instructions:
- Take a snag and sand it with sandpaper. If there is no driftwood, weave a few wires together to simulate a tree. Cover the wire with tissue paper.
- Take a napkin, unfold it and crumple it up. After slightly moistening your hands with water, shape it into a ball. Let dry completely.
- Glue the balls to the driftwood. Take a pot and put some styrofoam in it. Stick in a drift of balls and place a colored paper pillow on the styrofoam.

 DIY Easter crafts from napkins
  DIY Easter crafts from napkins
 DIY Easter crafts from napkins
Foamiran - enough new material in the domestic market. It is also called plastic suede or velor. It perfectly changes shape right in the hands of the craftswoman, because in order for the material to become malleable, it is enough to heat it in the hands. We offer to make an Easter basket from foamiran.
Materials:
- Foamiran different colors
- Glue gun
- Beads
- Filler for baskets
Instructions:
- Cut out a circle and a strip from the foamiran, which is equal in length to the circumference. Glue the bezel to the circle to make a container.
- Glue the handle. Connect the parts using a heat gun.
- Cut the foamiran into petals. Hold them a little in your hands and stretch. Put the details on soft tissue, and on top place corrugated paper... Iron the parts with an iron. This technique will add texture to the petals.
- Using a glue gun, glue the petals together, and attach the bead to the center. Glue the flower to the handle of the basket. After that, you need to decorate the handle with a thin satin ribbon. Fill the basket with crumpled strips of green paper and place the eggs.

 Crafts from foamiran for Easter: templates
 Crafts from foamiran for Easter: templates
 Crafts from foamiran for Easter: templates
There are many crafts that require a minimum of time and materials to make. One of these crafts are shell Easter bunnies.
Materials:
- 2 eggs
- Artificial fur
- Paper
- Paints
- Thin wires
Instructions:
- Take a raw egg and carefully remove the liquid through a small hole. Wash and dry the base. Color the egg white or beige.
- Attach the wire legs, having previously pasted over it with paper or corrugation
- Glue the forelock from faux fur... Draw the eyes and mouth.
- Cut long ears out of paper and glue them to the hare's head.

 How to make DIY Easter crafts quickly?
  How to make DIY Easter crafts quickly? How to make DIY Easter crafts quickly?
You can make a lot of interesting crafts from plastic capsules from Kinder Surprises. These can be chickens, rabbits, or bees.
Materials:
- Surprise capsule
- Foamiran yellow leaf
- Colored paper
Instructions:
- Cut the tail and wings out of the foamiran. Give them texture with your hands, stretching and twisting the details.
- Glue the parts to the yellow capsule. Cut the legs out of thick paper or cardboard and attach them using glue.
- Glue the beak and eyes.

 Easter crafts from kinder eggs
  Easter crafts from kinder eggs
Pasta is a rather strange and unusual material that is used in the manufacture of Easter crafts. You can make an Easter basket from them.
Materials:
- Pasta "Wheels"
- PVA glue or glue gun
- Balloon
- Spray paint
Instructions:
- Inflate the balloon and glue the pasta to it. From the bottom and up to half, the ball must be completely pasted over.
- Starting in the middle of the ball, lay out the handle of the pasta. Try to keep the pasta tightly against each other and there are no gaps. They must connect into one whole.
- When the pasta is completely dry, pierce the ball with a needle and gently remove any remnants.
- Use gold spray paint to paint the basket. Now you can safely fill it with eggs.
 DIY pasta crafts for Easter
  DIY pasta crafts for Easter
 DIY pasta crafts for Easter
A lot of interesting crafts can be made from fabric. These are garlands easter bunnies, chickens and garlands. Use diagrams and pictures.

 Crafts from fabric for Easter: schemes
 Crafts from fabric for Easter: schemes
 Crafts from fabric for Easter: schemes
A lot of interesting and unusual things can be made from salted dough. Try to make a stand for a chicken egg.
Materials:
- 320 g wheat flour
- A glass of fine salt
- Incomplete glass of water
- Paints
- Toothpick
Instructions:
- Knead the dough from the specified products. Roll a circle out of it. Make a rim from the dough and glue it to the mug, make a ponytail and a head.
- Glue the parts to the groove. Use a toothpick to emboss the garment. Place the product in the refrigerator.
- After the dough has hardened, paint it with yellow paint.
 Crafts from salt dough for Easter
 Crafts from salt dough for Easter
  Crafts from salt dough for Easter
 Crafts from salt dough for Easter
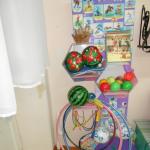
Ribbons are an inexpensive material that can be found at any fabric store. This material can be used to make a basket, eggs and even Easter wreaths. The photo shows a lot of ideas for creating such crafts.

 DIY ribbon crafts for Easter
  DIY ribbon crafts for Easter
 DIY ribbon crafts for Easter
This option is suitable for the smallest. These are kids preschool age, which modeling will improve fine motor skills hands. The easiest option is Easter egg.
Materials:
- Several pieces of multi-colored plasticine
- Kinder Surprise capsule
- Toothpick
Instructions:
- Roll the sausages out of plasticine. They should be of different colors.
- Spiral over the surprise capsule with thin sausages. Use a toothpick to apply the embossed pattern.
- Decorate the eggs with bows or plasticine flowers.
 Crafts from plasticine for Easter
  Crafts from plasticine for Easter
  Crafts from plasticine for Easter
  Crafts from plasticine for Easter
The easiest option is to make a garland of Easter eggs.
Materials:
- Felt of different colors
- ribbon
- Hole puncher
Instructions:
- Cut egg-shaped figures out of felt. Make holes on both sides with a hole punch.
- Glue strips and felt circles of a different color to the eggs.
- String the pieces onto linen and attach the garland to the dresser or window.

 DIY felt crafts for Easter
 DIY felt crafts for Easter
 DIY felt crafts for Easter
 DIY felt crafts for Easter
In order to make a craft for the competition, you can use your favorite technique. It can be a quilling card or a beaded Easter egg. The main thing is to do what you love and show your maximum imagination.
 DIY Easter crafts for the competition
 DIY Easter crafts for the competition
 As you can see, Easter is a wonderful holiday that will help you get closer to your children. Don't miss the opportunity to make holiday crafts together.
VIDEO: Easter baskets
Summary: DIY Easter egg. How to make an Easter egg with your own hands. How to make a beaded Easter egg. Easter egg made of paper. Beaded egg master class. Styrofoam egg.
In this section, we want to talk about how to make an Easter egg with your own hands. Craft an Easter egg is a great Easter souvenir for family and friends. Here you will find master classes on making Easter eggs from beads and buttons, we will teach you how to make Easter eggs using the papier-mâché technique, from us you can download ready-made templates for making Easter eggs from paper. With young children, it will be possible to mold colorful Easter eggs from plasticine or salt dough, lay out an Easter egg from a thermomosaic or glue it out of paper.
1. Craft an Easter egg. DIY Easter eggs
We will start with the most simple crafts Easter eggs, which even preschool children can make with a little help from an adult. From plasticine or dough for modeling, you can make a simple, but very colorful Easter egg craft for Easter.
You will need:
Plasticine (dough) multicolored
- cardboard
- scissors
- stack
- beads (pasta, cereals, etc.)
Cut out from thick cardboard the shape of an egg, at the top we pierce a hole in case you want to hang it on a ribbon. We roll out the dough thinly, cut it into strips in a stack (you can ride on them with a toy tractor - beautiful pattern it turns out), twist into tubes, just tear off the pieces, and decorate with everything that only has enough imagination: cereals, beads, pasta, shells, etc. Link >>>>
You can also try to make an Easter tree with preschoolers by decorating it with Easter eggs from salted dough. Decorating a house for Easter with the creation of an Easter tree is, first of all, a Western European tradition. This custom is especially widespread in Austria and Germany. The Easter tree is intended to symbolize the Paradise Tree of Life.

It is best to use willow twigs to make it. Place pebbles, pebbles, floral foam, moss, earth in a wide-necked vase or small bucket. You can simply place the willow branches in a vase of water. The main decoration for the tree should, of course, be Easter eggs. It is very easy to make them from salted dough. To do this, you can use an Easter egg stencil cut out of cardboard. It is best to paint Easter eggs from salted dough with acrylic paints.
It will be interesting for older children to make Easter eggs with their own hands from a thermomosaic. Unleash your creativity with intricate patterns to decorate Easter eggs. Just remember to leave small holes in the Easter eggs in case you suddenly want to hang them on the Easter tree.

For Easter, it would be appropriate to decorate flower pots with these homemade Easter paper eggs. To make this DIY Easter decoration you will need:

Colored cardboard or thick paper
- bamboo skewers
- decorative straw or ribbons
- glue
Cut eggs out of colored paper or cardboard according to the template. Glue two paper eggs together, remembering to insert a bamboo skewer inside. Decorate your Easter craft with decorative straw (as shown). Instead of straw, you can make a bow from a ribbon (braid).

If you are familiar with the technique of weaving from paper, then it will not be difficult for you to make such bright, colorful Easter eggs out of paper with your own hands. Such a garland can be used to decorate an apartment or a room for a kindergarten group for Easter.

2. How to make an Easter egg with your own hands
Making Easter eggs out of felt is a snap. Felt is a very easy material to work with. It can be treated like paper. Felt is glued, sewn on, easy to cut. When cutting out parts from felt, no fringe is formed along the edge. Felt has no face and no seamy side. You don't need to be good at sewing to work with felt. Actually, it is enough to know only two main seams: the needle-forward seam and the overlock seam. You can decorate ready-made Easter felt crafts with beautiful buttons, satin ribbons, braid.

3. How to make Easter eggs. Easter egg diy
To make an Easter egg as in the photo below, you will need: colored buttons of different diameters, tailor's pins, a foam egg, satin ribbons. Making a Styrofoam and Button Easter Egg is easy. We string a button on a pin or two buttons of different diameters at once and pin it to a Styrofoam egg. Thus, you need to decorate the entire Easter egg from all sides. Glue a satin ribbon bow on top.

4. Easter crafts. How to make a beaded Easter egg

Making such an Easter bead craft is much easier than it seems at first glance. You will need:
Styrofoam egg (sold at many online craft stores)
- beads
- sequins (preferably different sizes)
- tailor's pins "carnations"
- narrow ribbons

Making this Easter souvenir with your own hands will take you from 1 to 2 hours. The main technique for making an Easter egg from beads is to first string beads (beads) onto each pin, then sewing and pinning the pin to the styrofoam egg.


5. Easter eggs from beads. Weaving Easter eggs
An interesting master class on making Easter eggs from beads is offered by the Country of Masters website. This Easter craft uses a blown egg... How to blow an egg? To do this, pierce it from both sides with a needle, then pierce the yolk with a long needle or wire so that it flows out more easily. Blow the egg out gently with a straw into a bowl (you can also use a syringe).

Note: when working with eggshells, there is always a risk that they will crack. An original solution to this problem is offered by the Country of Masters website. In order for the shell not to crack when decorating, it is necessary to fill the blown egg with polyurethane foam. Detailed instructions see the link.

6. DIY Easter eggs. Easter eggs master class
An Easter egg can be decorated not only with beads. Easter eggs decorated with satin ribbons look beautiful. For this Easter craft, you will need: blown eggs, double-sided tape, satin ribbons, beads. Detailed master For a class on how to make an Easter egg decorated with ribbons, see.

7. Crafts Easter. Papier-mâché Easter egg

To make this Easter craft, you will need:
Balloon
- corrugated or crepe paper (crepe paper)
- plain white paper
- ribbon
- flour or starch for making paste
Work plan:
1. Inflate a small balloon. For ease of use, hang it on a string or place it on an inverted lid of a suitable diameter.
2. Cut crepe paper and plain white paper into small squares.
3. Make a paste from flour or starch.
4. Consecutively place one square of crepe paper in the paste and stick them on the ball, smoothing out the wrinkles.
5. After covering the ball with one layer of crepe paper, in the same way cover it with several layers of plain white paper, and then another final layer of crepe paper.
6. Leave the craft to dry.
7. Blow out and remove the balloon from the craft.
8. Draw and cut out a window in your Easter egg.
9. Decorate the window: dip the pieces of crepe paper in the paste and, slightly crumbling them, form balls. Stick these balls around the edge of the window.
10. Tie a ribbon with a bow and attach it to the top of the Easter craft.
8. Easter eggs. DIY Easter eggs
To make such an original Easter souvenir in the shape of an egg, you will need: a balloon, knitting yarn, PVA glue or paste, a cardboard roll, fat cream or petroleum jelly.

1. We dilute PVA glue with water in a ratio of about 2: 1.
2. Inflate the balloon to the desired size, tie it with a thread.
3. Having unwound the required amount of yarn, put it in a container with glue and leave for 5 minutes.
4. Spread the ball fat cream and we wrap it with yarn, for a start, leaving a large distance between the thread.
5. Gradually reduce the distance between the threads until the ball is completely wrapped in yarn and resembles a cocoon.
6. Leave the ball to dry (for at least a day).
7. Gradually untie the balloon, gently blow it off, and then remove it from the thread cocoon.
8. Using sharp scissors, cut a hole in the resulting egg from threads. We decorate the egg with ribbons, braid.
Place an Easter chicken or bunny and sweets inside the Easter egg.
Note: sugar syrup can be used instead of glue: 3 parts sugar and 1 part water. 
9. DIY Easter eggs. Paper easter egg
The easiest way to make a voluminous Easter egg out of paper is offered by www.craftandcreativity.com. colored paper beautiful, festive colors. For this Easter craft, special scrapbooking paper is best. Print on thick paper
Made from various materials.
You can use napkins, cotton pads, and even dough.
You can safely involve children in such creative work, for whom it will be not only interesting, but also useful.
Here are some very interesting Easter crafts that can be made from different materials:
Easter dough craft: Easter medallion eggs
You will need:
Salty dough
Ruler
Dough cutting mold
Scapula
Tubing (for small holes)
Aluminium foil
Paints (acrylic or aerosol)
Twine or tape.
1. Prepare salty dough... There are many ways to do this.
* If you don't want to make the dough, you can replace it with polymer clay.
Here is one way to make salty dough:
2 cups of flour
1 tbsp. a spoonful of fine salt
1 tbsp. spoon of wallpaper glue
* Mix flour and salt. Add a little water (a few spoons) to the glue and wait until it swells.
* Stir flour, salt and glue - knead the dough. You can add some water if you like. You should get a dough that sticks to your hands.

2. Use a rolling pin to roll out the dough to the desired thickness. In this example, the thickness of the dough is 6 mm.
3. Cut chicken eggs out of the dough.

4. Place these tins on a baking sheet covered with aluminum foil or baking paper. Make small holes with a straw so that the crafts can be hung later.

5. Bake at first at a low temperature - about 100 C. Then remove the aluminum foil and put the baking sheet back in the oven at 125 C. Be careful not to burn yourself. You can use parchment paper instead of foil and bake at 120 degrees for 2 hours.

Then place the salted dough pieces on the wire shelf.
You can turn off the oven and wait for the dough to dry.
6. Start painting your blanks, and after the paint dries, tie a ribbon and hang.

Easter pasta crafts: large Easter egg

You will need:
Pasta of different shapes
Markers (markers)
PVA glue
Paint (aerosol)
Big balloon
Hot glue.
1. Inflate the balloon.
2. Mark the place for cutting on the ball with a marker.
3. Apply PVA glue to the entire ball, except for the designated area.


4. Begin gluing the pasta to the ball so that you have a pattern.
5. When everything is dry, you need to remove the ball - pierce it with a needle.

6. It's time to decorate the craft. It all depends only on your imagination.
7. You can put the craft on a stand and paint with spray paint - in this example, gold.


DIY pasta crafts for Easter


You will need:
Chicken eggs
Small pasta
PVA glue
Aerosol paints (if desired).
1. Get rid of the contents of the egg.

2. Apply PVA glue to the shell.
3. Glue small pasta to the shell (you can glue each pasta, sprinkle or dip in a bowl).
4. You can use lentils or peas in addition to pasta.
5. When the glue is dry, paint the egg. Paint one side first, then paint the other half.


Easter paper crafts
Easter chicken. Option 1.
To make such a craft, you first need to download a template. You can also draw the template yourself.


Easter chicken. Option 2.
A paper chicken can be made from paper plates or cardboard from which you want to cut a circle. Just fold the paper plate in half, cut out the wings, eyes, beak and scallop from colored paper and glue them to the plate.


3-D Chicken
For such a craft, you also need to download a template for a paper model of a chicken, cut it out and paint it.


Easter napkin crafts: stand

1. Prepare a paper towel and fold it in half diagonally.


2. Fold the corners of the resulting triangle up so that they connect to the top corner. You should have a square.

3. Roll the bottom edge of the square to the middle with a roller.

4. Now flip your design and connect the bottom corners that are under the roller. These corners should be secured with a paper clip.

5. Flip the blank back so that the paper clip is at the back. Spread the ends of the blank in different directions, and you get a beautiful stand for an Easter egg.
We paint eggs with do-it-yourself napkins

1. Dip a paper towel in the vinegar, squeeze out any excess, and wrap it around the egg.

2. Place the egg on a plate or baking sheet and gently begin adding drops of colored food coloring.

3. When the whole egg is colored, remove the paper towel and place the colored egg in the cardboard box.

Easter egg crafts: decoupage

You will need:
White eggs
Napkins with beautiful designs and patterns
Scissors
PVA glue.

1. From paper napkin peel off the topmost layer, you won't need the rest.
2. Cut beautiful drawings and patterns. You can cut with white edges and not necessarily neatly.
3. Prepare an egg and brush it with glue or egg white.
4. Glue the cutout pattern to the egg and apply a layer of glue on top with a brush.
When everything is dry, you will have a beautiful Easter egg.
Crafts from cotton pads for Easter: chicken


You will need:
Cotton pads
Yellow paint for eggs
Colored paper
Scissors
Chenille wire
1. Dilute the yellow paint with water. Dip 2 cotton pads in the solution and stain. Then leave the discs to dry.
2. Use chenille wire to make the chicken legs.
3. Cut the scallop, wings and beak out of colored paper.
4. Glue all parts between two cotton pads.
5. Glue the toy eyes and the chicken is ready.
DIY Easter wreath

You will need:
Willow wreath (you can make a wreath with your own hands)
Plain paper napkins
Corrugated paper
Colored and regular cardboard
Scissors
Simple pencil
Hot glue
1. Making decorations for the wreath. Cut out several circles of different diameters from paper: the circle for the body has a diameter of 5 cm, for the head 4.5 cm. The more circles, the more voluminous the detail.

2. Cut 2 more circles out of cardboard, each with a diameter of 2-3 cm. This will be the base of the chicken.
3. Now glue all the blanks. Start by applying a little glue to the center of the first circle and glue the next. Thus, glue all the circles together.

4. Glue a piece of cardboard to one of the circles.
5. In a similar way, you need to glue another stack of circles.
6. Make small cuts on the circles, and then fluff the circles.

7. Cut out the chicken's beak, legs and wing from colored cardboard. In order to fasten the body of the chicken, cut a strip from the cardboard and glue all the details to it - the wing on one side, and everything else on the other.
8. Make the eyes. You can use plasticine, buttons, or other parts that are suitable in size and shape.
* If you wish, you can make another chicken in a different color.

9. Making decorative flowers and eggs. Take dust wipes. Felt can be used, but it is more expensive. Cut out ovals that will act as Easter eggs and various patterns for them.

I always associate Easter with the sun and light. I was happy to paint testicles and make applications for my relatives. I liked walking down the street and shouting "Christ is Risen!"
Growing up, I began to understand that for me it was family holiday when there is peace and tranquility in the soul. The approach of spring and warmth is already felt and a strong feeling is formed that something magical is about to happen.
The child also wants to instill respect for this holiday and one of the stages of such upbringing is to make a craft.
As we know, the symbols of Easter are the egg, the chicken - the meanings are symbolic and imply Life. V Christian holiday there was no Easter Bunny. It came from Western traditions, but it's interesting to make it too.
It will be very easy with children to make a paper craft. She easily takes any shape, so it will be interesting for the baby to work with her.
There are a lot of ideas from paper and cardboard, so let's start with cute figures of a hare and a chicken.

You can draw any shapes, or just a testicle, to which add eyes and a mouth.

Divide half of the figure with a horizontal line.

And from it at a distance of 1 cm we draw parallel lines.

Carefully begin to cut. You also need to cut out five strips of a different color 1 centimeter wide.

One edge of the strips of a different color must be glued. For this, tape or glue is suitable. If you have scotch tape, wrap it on the wrong side.

Thread the strips alternating with the main ones. You will get a weaving technique.

All strips should be the same width, then the result will look neater.
And here's another idea for cute testicles with pet pockets.

A paper stand in the form of a chicken-laying hen. Very bright and thematic craft.

Using this template, you can cut out the hen and glue the stand itself.

An interesting option for a stand from a tray for eggs and chicken made of cardboard.

All with the same paper tray, you can make another version of the coasters.

Cut the tray so that there is one divider and one place for the egg. Remove all unnecessary paper and backing in front of the separator.

Let's paint the workpiece in White color and glue the eyes, beak and comb.

The diagram is shown below.

We cut out according to the template, bend all the allowances and side parts so that the basket can take a semicircular shape.

We glue the allowances and the front sides of the handles.

For those who make postcards, I found such a cute tsipushka. I could not pass by it, by the way, it was made using the scrapbooking technique. It was necessary to come up with the idea to make the eyes of the buttons.

For the next applique, we will take many colorful stripes and two sheets of cardboard. One will be the base on which we will glue all the strips in order under each other.
And in another sheet of cardboard, we will cut out an oval in the shape of an egg and glue it on top of the blank.

We can also create such wonderful bunny-shaped coasters from cardboard. Cut a strip 8 centimeters wide from the cardboard. We form a circle, having previously measured it in the widest part of the egg. And we glue the sides with hot glue or connect with a stapler. Then we measure the bottom and glue it from below. It remains only to add ears and eyes.

Nice present again in shape eggshell can be done in five minutes.

Use this template, which can be sent to print right away.

And any child will be delighted with the thematic garland. Look how rosy and festive she looks, I immediately wanted to smile and start creating.

And here are the silhouettes of bunnies for cutting.

Make more workpieces. It is better to take double-sided and thick paper.

We glue the tail, it can be made from cotton wool or a strand and we connect all the silhouettes.

A funny and very simple congratulations on this. happy holiday you can create in the form of a postcard.

And also a funny wreath for inspiration. For him you need to find ribbons, a disposable plate and many different backgrounds printed on paper.

To cut out identical ovals, you need a shape. These helpers are sold at craft stores or in the cookie baking section.

On the glue, lay on top of each other, begin to form egg rows.

There are always a huge number of ideas from paper. As you can see, all crafts are created very quickly, and they are easy to dispose of if you do not want to save them as a keepsake.
Easter crafts made of felt
Chickens, baskets and the testicles themselves are made of felt.
I liked the idea when the fabric is shaped like an egg and beautifully decorated. They can be folded into a wreath or hung on willows, thus making an Easter tree.

Attach loops or string to the blanks so that you can decorate the willow or curtains with them.

The shape of the egg is very simple, but at the same time it gives a lot of room to the imagination.

See how the craftswoman came up with the idea to put the blanks on the skewers. So it is more convenient to hold them, and you can still stick them in the ground with flowers or put them in a vase.

In felt, it is important to close up the edges well so that the inner filling in the form of cotton wool or padding polyester does not crawl out through the seams, otherwise the present will not look neat.

Felt comes in a variety of thicknesses. Do not buy too fat, on such a testicle it will look rough and awkward. It is optimal to choose a thickness of 1.5 millimeters.
Crochet egg patterns
Incredible beautiful crafts obtained when the egg is crocheted. Delicate openwork composition on the table will immediately attract the attention of guests, and delight you with its beauty.
Here are some knitting patterns for inspiration so you can start getting ready now.

You can simply alternate double crochets in different colors, or use one of the patterns below.

Here are three more knitting patterns. They are immediately shown how they will look on the egg.

And this is what an egg looks like, tied with single crochet or "elastic". Looks very cool too.

We do not take a real egg, it is too fragile for needlework. We will use balloon, inflating it about the same size as the testicle.
Crafts for Easter from plastic bottles to school
A very cute and functional idea that any student can make. Make a storage container.
It is not a shame to show such a craft at school and is convenient to use in everyday life. You can store small things in it and fill it with felt circles, then it will turn out great option decor in the nursery.

Funny animals, right? For them, you will need any bottle, but a small volume is better, a napkin for pastries and decor. The entire master class is shown on the collage.

Also, bottles can be made into a basket, in which the child will neatly lay out his own painted testicles.

Specifically, in this idea, I think the teeth are superfluous, but I do not insist on it.
How to make a satin ribbon craft
With the help of ribbons you can make interesting decor eggs. Of course, we again take not a real one with a thin shell, but a homemade base. It is better to buy it, but it can be made of foam rubber or polystyrene foam.

Also, such forms in the form of eggs are created from papier-mâché. There are a lot of base options.
As a last resort, you can take an egg, pierce it at the top and carefully pour the white and yolk through a small hole, and use an almost intact shell as a base.

Secure the edges of the tapes with tape or hot glue.

And we wrap, each time fixing the ends from below. Try to keep the strips pressed tightly and there are no gaps between them.
I also applied pieces of double-sided tape on the sides so that the tapes did not move relative to each other.
Master class from improvised means at home (threads, dough, etc.)
I really liked the thread shell. Such a cute applique is obtained.
And after all, you can put anything inside, you want a chicken, or you want colorful eggs and sweets. The idea is just great.

For this craft, we will use threads, paste or PVA glue and a balloon.
We inflate the ball, tie the tail tightly so that it does not decrease in size until our structure dries up.

Cooking paste. To do this, take 1 liter of water and 4 tablespoons. flour.
Pour water into the flour and stir to break up the lumps.
Then we put the mixture on the stove and heat, bringing it to a state of a viscous and sticky consistency. We leave it to cool, and then try for stickiness. It should adhere well.

We wrap the ball with threads, smearing each layer abundantly with an adhesive mixture. You don't have to save it, because the product is completely natural and easily made if the required volume is suddenly not enough.

We are waiting for the paste to dry completely and pop the ball inside. To see the inside, you need to carefully cut out a circle with scissors.

I also liked the children's puff pastry idea. It turns out very colorful and harmless.

Knead the dough in a 1: 1 ratio. So, we will take 1 glass of flour, 1 glass of salt. This will be our base, then we introduce five tablespoons. sunflower oil and add one glass of flour until a soft and elastic dough is obtained.

We give the dough the finished shape, make holes, mark the drawing and dry it.

You can dry it for a day in the sun or 3-4 hours in a warm oven.
Now it remains to paint the blanks with gouache or food colors.

Pass the string through the holes and decorate the twigs, thus creating an Easter tree.

An interesting option for creating an applique using a potato stamp.

Cut off a piece from the tuber. Beforehand, rinse the peel well so that the earth does not crumble onto the craft.

We give the insides of the stamp a simple pattern in the form of zigzags, circles or other simple geometric shapes. We try to make the distance between the lines of the pattern.

We paint the protruding elements and apply to paper.

Here's what you can get. Believe me, such work will captivate a child for a couple of hours.

If you have napkins and disposable spoons left from last year's picnic, we will also use them.

And from a disposable cup we will create a bunny face.

The fantasy of needlewomen and mothers knows no bounds. And ordinary household things you can create a craft.
Simple crafts for Easter from cotton pads
The little ones also have something to do, such as making wonderful chickens out of cotton pads. They not only need to be glued in the right places, but also painted in the desired color. Sprinkle cereals on the glue at the beak, a yachka or semolina will do.
The child will develop fine motor skills and imagination and a warm attitude towards Easter will already begin to form.

Another interesting and simple idea... Self-adhesive paper can be used for the beak and eye.

We use a cotton pad and a disposable spoon. You will need a piece of paper for the wings.

Easter crafts are done quickly and the child does not have time to get tired or overworked.
How to braid an egg with beads and weaving patterns
I think the process of braiding the form with beads is also a craft. It goes not so much as decorating eggs, but rather interesting itself creative work... Yes, and you can take not the testicles themselves, as I wrote above, but any other basis.

The process starts at the very top. A row of six beads is made, then one bead is added between them first, then two beads. And the result is an increase in width.

As soon as you reach the widest part of the base, then, according to the same principle as you started, proportionally reduce the number of beads.

Here's another interesting scheme for weaving.

And you can make a craft in the shape of a cake, it turns out very believable and festive.

Thank you, dear readers, for your attention, bookmark the article so as not to lose it when you want to start creating with your baby.
We also recommend
 Why doesn't the husband want a second child?
 Long bob with bangs on fine hair
 Features of the design of thematic corners in the younger group
 Selection of makeup for your type of appearance How to choose your makeup
 Dyufaston or Utrozhestan - which is better?
 Face contouring (cheekbones): How to make cheekbones with makeup How to highlight cheekbones in makeup