Decoupage of a leather bag. Decoupage bags "Letter from Paris
Useful enough as all girls love a lot of new bags. Why spend money on their purchase every time, when you can make a fantastic decor to your taste and color! Well, well, let's see!
FOR WORK YOU WILL NEED:
- old bag
- printouts, napkins or decoupage cards
- acrylic paints
- PVA glue
- Brushes
- Glassy varnish
- Sponges or sponges
So, we take the bag, it is desirable, of course, that it be in a more presentable form, without severe abrasions. We take decoupage cards, napkins or printed pictures on photographic paper. The most important thing is that the photo paper is the thinnest. We take a crayon and outline the location of the drawings, after which we cover these places with white acrylic paint. We leave to dry.


decoupage bags master class
DECOUPAGE BAGS OWN HANDS
In the meantime, take the skin and remove the extra layers of paper from the image. Pay special attention to the edges. Then we put our printout in a bowl of water for 2-3 minutes. The image will fade a little, but don't be alarmed. After varnishing, it will become brighter. In addition, the wet image will absorb a larger amount of PVA glue, which means that the image will stick more firmly. We take PVA glue and thoroughly coat the marked place on the bag. without waiting for the glue to dry, apply a wet printout and additionally cover the edges of the drawing with glue, you will notice the whole drawing. The main thing is to do everything quickly and accurately, because the pattern will begin to smear from prolonged exposure to the glue. We take a dry rag and carefully go over the surface of the drawing. to remove excess moisture and glue. The main thing is not to poke around with a rag, but just to get wet.
Pour some black acrylic paint into a separate bowl (disposable plate), use a sponge, or cut a small piece from a dishwashing sponge. We dip the sponge into the paint and carefully tint the edges of the picture. Then you can add the decoration to your taste and color. We have added calligraphic lettering. After all elements are completely dry, the bag must be covered with glassy varnish. It will not crack while using the bag.

decoupage old bag master class for beginners

decoupage of an old bag step by step mk with a photo

decoupage of an old bag master class step by step

decoupage of an old bag master class with a photo

decoupage of an old bag master class photo with a description

decoupage old bag step by step wizard Class
DECOUPAGE BAGS READY!

WE WISH YOU GREAT SUCCESS IN YOUR WORK!
Over time, even the highest quality and most expensive leather items age and lose their attractive appearance. Decoupage on the skin - a decorative technique that every novice needlewoman can do - will help them return their former attractiveness and extend their life for several more years. Of course, it is much easier for someone to purchase a new thing, however, if you wish, you can become the owner of an original and stylish accessory.
How to make decoupage on leather and leatherette
It is not difficult to make decoupage on the skin; for such work, you need to prepare the following tools and materials:
- decoupage napkin with a pattern or pattern that you would like to see on your purse or wallet;
- acrylic paints;
- acrylic primer;
- brushes for applying paint and varnish;
- sponge for applying primer;
- PVA glue;
- adhesive sealant;
- leather product that needs to be restored.
When all these materials are prepared, you can proceed to a master class on decoupage on leather or leatherette:
The first thing to do is to degrease the surface of the material on which the drawing or pattern will be applied.

To do this, wipe your purse or purse with a cotton swab dipped in alcohol or another alcohol-containing product.

Wait until the surface of the leather or leatherette is completely dry, and use a sponge to apply acrylic primer.

When the primer is completely dry, you can sandpaper over it to make the surface of the product even smoother and more even.

Now you can go to the selection of patterns for decoupage.

Cut the prepared napkin into small pieces, choosing suitable fragments with pictures.

Do not forget to pre-attach them to the product that you are restoring, so as not to cut into smaller pieces.

Lubricate the pieces of napkin with PVA glue and attach to the surface of the leather accessory. This should be done with all the drawings that you have prepared for decoupage.

When the PVA dries well, the entire surface of the leather product must be covered with a sealant glue.

It will give the leather or leatherette elasticity, which will increase the wear resistance of the material during use.

Cover areas on the leather product that were not sealed with napkins with acrylic paints, choosing the appropriate color.

After the acrylic paint has dried, the surface of the product should be covered with adhesive sealant again.

After the last layer of sealant has dried, the leather item that has been restored must be varnished.

It is desirable that the decoupage varnish on the skin is glassy. It will add volume to the drawings, and also reliably protect the surface from mechanical damage.
Decoupage passport cover: master class

Decoupage on the skin of a passport cover will allow you to create an original and exclusive accessory that will perfectly suit your loved ones as a gift.
To decorate the passport cover in this way, you will need the following materials:
- acrylic spray;
- decoupage card;
- decoupage glue;
- sponge brush;
- palette;
- art brushes;
- acrylic primer;
- glassy varnish.
To decorate an accessory, adhere to this decoupage master class on the skin:


Carefully wipe the surface of the passport cover with acetone, alcohol or a special liquid for degreasing leather and leatherette.

Apply acrylic primer to leather or leatherette, leave to dry.

When the primer is completely dry, use an art brush or sponge to paint the background with acrylic paint of blue color, let the material dry completely.


Apply acrylic paints of other colors on a dry surface - blue and white paints will look beautiful, creating additional effects.

You can apply additional paints with a sponge in the form of longitudinal stripes.


The corners of the passport cover can be tinted with silver paint.


At the next stage of decoupage, you can start drawing fragments of the card on the cover of your passport. For this you need to use glue.


After the fragments of the decoupage card have completely dried, the surface of the cover must be covered with glassy varnish, applying it in two layers.


When making decoupage on leather or leatherette, it should be borne in mind that this is a rather elastic material, therefore, for decorating in this way, it is better to choose areas that are not subject to folds and stretches.
Decoupage on leather and leatherette using a printer

You can make decoupage on the skin using a printer - using the printing technique. This decor technique has many obvious advantages.

In addition to the fact that on the Internet you can find a variety of beautiful pictures, which are not on napkins and decoupage cards, any image can be edited in size, color, hue and brightness. Also, if you wish, you can remove some elements and add others.

Decoupage with a printer makes it possible to work even with photographs. Thanks to the use of this technique, you can apply your photographs to leather goods and present them to loved ones.

It is best to choose large images without significantly reducing them, otherwise the quality of the picture will suffer. It is advisable to print pictures on a color laser printer. In these devices, not ordinary ink is used, but a chemical powder, it does not flow when exposed to water and moisture, which pictures are exposed to during decoupage.

To print pictures, you can use not only photo paper, but also rice paper for calligraphy, tracing paper, napkins, office paper.
To print a picture on very thin paper, follow these steps:

Thin paper must be glued to the office sheet with masking tape. Pay particular attention to the side where the sheet will enter the printer and secure it securely.

If the drawing is printed on a napkin, it must first be smoothed with an iron, and then attached to thick paper in the same way.

If the size of the pattern is almost the same as the leather product, you do not need to trim it. You can stick to the surface of leather or leatherette, let it dry, and then sand the edges with sandpaper.
Imitation of reptile skin using decoupage technique on a bottle

Imitation of leather in decoupage on a bottle always looks beautiful and original. It is not difficult to make such a decor at home.
To complete the work you will need:
- glass bottle or flask;
- printout for decoupage;
- white eggshell;
- PVA glue;
- gloss acrylic varnish;
- stained glass paints on an organic basis;
- acrylic metal paints;
- tweezers.
Reptile skin effect creation process:

Lines should be drawn on the surface of the bottle - a vertical center line and several horizontal ones.

You can also apply a design that mimics the skin of a reptile, so it will be easier to do decorative work.

Using tweezers follows from eggshell to form elements of the reptile's skin - "scales".

Before pasting the bottle with eggshells, they should be painted copper or bronze.

Apply PVA glue to the glass and attach the "scales"; when the eggshell cracks, it should adhere tightly to the bottle.

The entire surface of the bottle should be lined with eggshells of various sizes.

When the whole bottle is sealed with a shell, it should be well dried.

To do this, leave the bottle in a warm place for 10-12 hours.

After the "scales" have completely dried, their surface should be degreased with white spirit, and then metallic paint - silver or bronze - should be applied to the spaces between the eggshells.

Apply stained glass paints in even drops on the "scales" located in the central part of the bottle vertically.

When the paint dries, the top of the bottle must be covered with a glossy varnish.
Decorating any objects and products using decoupage technique is not difficult and very exciting. Today I want to show you how you can transform a handbag using decoupage.
So, I have a new handbag that I bought as a gift. The bag is, of course, cute, but I want to make my present truly unique and original.
For a bag using decoupage technique, I use glue for decoupage on fabric, sharp scissors, wide brushes made of bristle and pony pile, matte acrylic varnish.
First, the surface of the product must be properly cleaned of dirt and degreased. To do this, you can use alcohol or another suitable agent.
Then we cut out the drawings we like from a decorative napkin. For this work, we will only use the top paint layer, so the two white non-colored layers of the napkin must be carefully removed.

When the drawings are prepared, they must be glued to the surface. I apply the motif to a dry surface and coat it with glue on top using a bristle brush. When gluing, I press the motives tightly, but very carefully, trying not to stretch them too much. My purse is small, so the decorating work is done very quickly.

After the drawings are pasted, following the instructions of the decoupage glue manufacturer, I leave my work to dry completely for a day. I highly recommend to hide the product for this time somewhere far away in order to protect yourself from the temptation to touch the motifs that have not yet dried.
A day later, I take out my purse from a secluded place and use a Pony nap brush to cover the surface with glued motifs with two layers of acrylic varnish. Let the work dry. My decoupage handbag is ready for the solemn presentation to its new mistress!

Similarly, you can update your old handbag, with which it is a pity to part, as well as decorate any textile accessories.
Administrator's note: the photo shows the address where you can learn more about all the author's works.
Every woman wants to look bright and beautiful.
And accessories help us in this,
and we can do some of them even with our own hands.
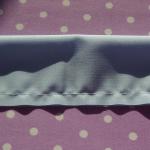
So today, for my beloved, I made a new bag for the holiday.

Want to do something similar? Then read on
- bag made of leather or imitation leather
- three-layer napkin
- scissors
- brushes different sizes
- acrylic paints for textiles (fabrics)
- contours for fabric
- glue for leather, textiles Textill Potch
- fine abrasive cloth
- baking paper or cloth
- iron

1. Of course, it all starts with an idea))) the idea to buy this bag was born when I once again went to the store and was looking for something suitable for a new spring blouse So my thoughts started and started spinning)
2. Now we are looking for a plot on napkins. And if there is not enough motive, then we compose from several.
3. Apply Textill Potch glue for textiles to the bag itself 
4. After that, immediately apply the napkin to the base and coat the napkin with glue on top with a flat brush. You can start from the corner and then pull the paper neatly so that there are no folds, or start from the center to the edges as we glue the napkin on any other basis.
We glue the napkin carefully so as not to tear it. You can also use the file sticking method.

5. After we have pasted one fragment, we do the same with the second, joining the sides of the napkin.


6. Even if somewhere the napkin is slightly torn, do not worry, after the glue has completely dried, we can tint it.
To do this, we take paints on textiles (fabrics) and tint the color we need.
First, I paint over the top and bottom with blue to align in one line and partially paint over the places where the napkin broke (upper right corner) 
- then we tint the rose and a little butterfly with yellow 
- the next stage is starting to draw rose leaves, letters, to combine the drawings
7. After all the paints have dried, we begin to paint on the necessary details with contours on the fabric 
- draw the borders of letters and the middle of flowers 
- draw the letters on the card with a golden outline and make the edging 


- we draw individual details - antennae of butterflies and volumetricness on roses to make the drawing more voluminous
8. We add details and personality to the work. These are our additional motives from the napkin (tag), for which we paint on a string and the words "with Love". We act in the same way as gluing and painting on a large motive.

9. In places where at work we still have folds of napkins, carefully sand them with a fine sandpaper, or simply remove them with a fingernail, pressing them to the base


10. After everything is completely dry at the time specified in the instructions for the materials, we completely cover the work with another layer of Textill Potch glue

We are waiting for the glue on the bag to dry.
11. Now we need a cloth or baking paper, an iron and our bag. We fix our paints, contours and a napkin under the influence of temperature - we heat the iron by 2 divisions and over the drawing on baking paper or on the cloth we draw it according to the drawing. Also, in addition, I go through an iron and inside bags, while placing baking paper under the drawing on the board.


Decoupage is the decoration of various objects by cutting out images. Most people throw away their old things, and it is with the help of decoupage technique that you can give them a second life. Those knickknacks that are a pity to throw away, but at the same time they take up space, can serve as an excellent basis for a new creation. Decoupage of old things is original way manifestations of fantasy and the revival of a bored object at the same time.
There are things that are especially dear to the heart that the hand does not rise to throw away. They are usually fond memories of the past, or they were held in the hands of those who are no longer around.
To age a book using decoupage technique, you will need:
- The book itself;
- PVA glue;
- Acrylic paints;
- Wood stain;
- Plate with high edges;
- Water;
- Brushes.

Water is poured into the plate. The book opens in the middle. After that, you should wet your hands and run them well on both sides of the page. This should be done with each page. They should dry for about a day. Then PVA glue is diluted with water, and the resulting composition blinds each page to each other in such a way that an open "old book" can be obtained. You need to wait until the sheets are completely dry. The stain should be water-based and diluted to the desired shade. It is applied with a brush to the pages of the book.
Add bronze, silver or gold paint to the cut of each page. Then decoupage is performed on the main page in the usual way(the colored layer of the napkin breaks off and is glued to the glue).
The cover of such a book can be made of worn fabric or a border of wallpaper - there is no limit to your imagination. You can glue notes or age a photo, use tulle or homemade paper. You can supplement the resulting item by decoupage bookmarks.
Self-decoupage bags
There are a lot of advantages in decorating bags using decoupage technique. This is not a difficult and very addictive process that brings a lot of pleasure. The result is an exclusive item. When a leatherette bag acts as an object of testing, it must be taken into account that leatherette has a drawback: it is soft, so the product does not have a strict shape. This may interfere with decoration. Have leather bag there are no such problems.

The stages of work contain items:
- The bag is wiped with a damp cloth, while dust and dirt are removed;
- For the most flat work space, the bag is stuffed with crumpled newspapers;
- The decorative napkin is stratified, the necessary motives are torn out or cut out;
- Glue is applied over the motives, then they are glued.
The glue must dry for at least a day, during which time it forms a film resistant to moisture. After drying, it is necessary to coat the motives with glue again.
DIY crafts: decoupage a bottle of champagne
Each holiday is accompanied by a bottle of champagne on the table - an invariable attribute of any fun. If you want to decorate the table and amaze your guests, you can transform the bottle yourself.
To do this, you will need:
- Champagne bottle;
- 3-layer napkin with a picture;
- PVA glue;
- Water based paint;
- Acrylic paints;
- Foam sponge;
- Acrylic lacquer;
- Details for decoration (ribbons, sequins, etc.).

Remove the label from the bottle, hold the bottle in warm water for about 15 minutes, then cover with white water-based paint in several layers, this will hide the color of the bottle itself. Each layer must dry well before applying the next. Use a sponge to apply acrylic paint to give the bottle the desired color. Next, glue the cut motifs of the napkin with PVA glue (the glue should be diluted with water), having previously separated the top layer. Irregularities must be avoided. The finished bottle can be decorated with a ribbon or other beautiful details. When the product is completely dry, it must be covered with acrylic varnish.
When removing the label from the bottle, it is often difficult to remove the adhesive. In this case, a solvent should be used, but after that the bottle should be thoroughly rinsed with detergent otherwise you won't be able to apply acrylic paint.
What can be decorated with decoupage
The passion for decoupage originated from China and then spread all over the world. With this rather simple technique, you can update almost any item, decorate a house in your own style, transform a birdhouse, or even completely change the interior of your country house.

There are several options where you can look for blanks for decoupage:
- Available for purchase already finished material in a store for creative people (for example, in "Leonardo").
- Search at home. Instead of throwing away a boring and old item, you can revive it. It can be a painting, or even a piano, but before that it will be necessary to prepare - to sand and degrease the surface.
- Go to swap meet... With the help of decoupage, it will be possible to make a folio bought there more modern or to emphasize a touch of antiquity.
- Items from regular stores. The most ordinary diary, postcards, bookmark or cover for a passport or driver's license can become a real work of art.
By changing familiar objects, you can use a crackle, which will help create cracks on the surface, or a special silicone that creates a 3D effect.
House in decoupage style
Decoupage toys for children can look particularly attractive. You can buy a small wooden house, and then create a real miracle out of it. Usually, these houses have small shelves, baths, chairs, beds and other necessary household items in the set.

The stages of decorating such a house are as follows:
- Roof priming and painting;
- Decoupage the walls of the house with napkin wallpaper;
- Filling the house with small details (a figurine in the form sewing machine, kerosene lamp, etc.);
- Paint furniture, sew linens for beds and curtains;
- Hang homemade paintings on the walls, the rest of the decor.
This kind of work is very painstaking and time-consuming. It's great if the children show a desire to help and join the design: this will contribute to their development in a playful way.
Crafts for children: decoupage for preschool children
Little researchers need to be gradually introduced to various types of creativity, especially if they themselves show interest. But in order to grow to serious crafts, you need to start somewhere.
For the initial work with a child, it is necessary to take non-toxic materials instead of professional ones, in addition, their amount should be minimal.

Progress:
- Surface preparation. The workpiece is primed with a sponge. Holding the child's hand in your hand, you need to guide him, showing the method of application. Then you can let him try to do the same.
- The primed workpiece must be blow-dried to dry quickly. Such work is allowed to be entrusted to the child.
- The napkin is stratified, leaving its upper part in the pictures. Superfluous details are cut off.
- The image is covered with a layer of PVA with a slight movement. Tell the child to move the hand gently. The product is dried again with a hairdryer.
It is necessary to give the child as much freedom of action as possible, while making sure that he does not injure himself or harm himself.
Decoupage products (video)
Decoupage is able to charm almost any person. In the past, getting rid of old things was considered a good quality, but now miracles can be created from such products. You can create a cover for an old cookbook of recipes using decoupage, give the skin a fresh and updated look, paint the sides of kitchen utensils, for example, a cast iron, and a decoupage bookcase will pleasantly surprise guests. Variety of images (stripes and cells, floral motives, vintage, etc.) will help transform even the ugliest item.
We also recommend
 Rules for grinding and wet-heat treatment of garments
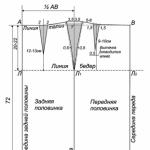
 Building a pattern for the basis of a dress: Italian technique as the easiest way to make a good pattern
 How to build a dress pattern base
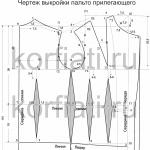 We model and sew coats!
 Skirt of the year, construction of a pattern
 Fashionable children's skirts from old jeans - patterns and description