Master class: how to sew a super fashionable Cape-transformer in no time. all girlfriends to envy! Impressive one-piece coats! Cape sleeveless cape pattern
Cape-transformer - this is the thing that should be in the wardrobe of every woman keeping up with the times! This piece is as practical as it is simple in cut.
No doubt, everyone can sew it in a maximum of 3 hours. Well, if you have ever held a thread and a needle in your hands, then everything will turn out much faster.
![]()
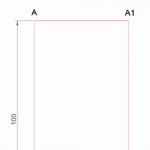
Cape pattern
Depending on what time of the year and with what you will wear the cape, the material and diameter of the cape are determined. A medium weight fabric with 50% wool and 50% polyester will be the best option. For size 42–46 (Russian) with a height of 170 cm, you will need a cut of 155 cm by 140 cm.
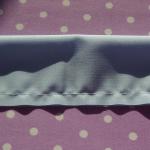
This is what the pattern should look like. The fabric should be ironed thoroughly before opening.
![]()
It will be easier to cut if you fold the pattern and fabric in half.
![]()
Virtually everything! If you have fabric that does not crumble along the cuts, then overcasting is not needed. If processing the cut cannot be avoided, and there is no overlock on the farm, then the edges can be bent or edged with something.
![]()
The point is small - to come up with what will be the quality of the belt at the waist. You can cut a wide strip of the same fabric and fold it in half to sew a belt, or you can pick up a wide leather belt that is contrasting in color.
![]()
Here's a simple master class turned out. On my own I would like to add one small BUT. It seems to us that in this master class, the pattern is not entirely correct, or rather, the length between the cutouts is incorrectly calculated. Therefore, we add another pattern found on the Internet, and a short video on how to calculate the length between the cutouts.
![]()
As soon as they do not wear a Cape-transformer! Take a look!
![]()
![]()
![]()
For clarity, we offer you a video "10 Ways to Dress a Cape Transformer"
The product is almost dimensionless: it looks gorgeous on any figure! To increase or decrease the size, you can slightly change the pattern by decreasing or increasing the diameter of the circle itself and the diameter of the armholes.
The pattern of the cape is very simple, so it will be quite easy to sew a new stylish coat.
The choice of fabric.
The cape can be worn from spring to autumn, so the fabric can be either warm or lightweight. Find the fabric you like best. When it comes to autumn, it can be a soft bouclé coat that can be used for both spring and early fall. If it's summer, choose a lightweight, flying fabric that will accentuate your gracefulness!
We chose the fabric, let's start building the pattern.
Step one.
We need a fabric of about 130x260 cm in size. With this size of fabric, the cape itself will be about 100 cm long. Fold the fabric in half, right side to each other. It gets a rectangle 130x130 cm in size. We fold the fabric again to make a triangle (see picture).

Cape pattern, lay out the fabric.
Step two.
We put aside a radius of 130 cm from the upper currents. Cut off the excess. We unfold the pattern of the cape on the fabric. Look: we have got a big wedge skirt sun flared. We shift the fabric so that the edges of the fabric fall into the middle (place for fasteners).
Step three.
We put aside the length of the back. We mark the shoulder seams with smooth lines and outline the neckline. We cut it off. Sew shoulder seams. You can throw the kei over yourself. Sits right !?
Step four.
We make slits for the arms at such a distance and width from the center of the product that it would be convenient for you to walk in a cape. The height of the slot is somewhere between 30-35 cm. 
INCREASE
Step five.
We finish the cuts of the fastener, the bottom of the product and the cuts for the hands. You can make the edging from another material, you can use the same one, or you can take the leather, the main thing is that the fabric does not wrinkle much.
Cut into strips 2.5-3 cm wide. If the fabric does not wrinkle, then we first apply the trim from the front side and attach it to the main fabric, and then wrap it on the seamy side - we attach it again. We also do the bottom of the product and the slots for the cape's arms. Sew on the fasteners we have chosen. You can only fasten the cape from the top using a homemade strap, a button, a chain - whatever you like best. You can use Velcro, decorating it beforehand. Choose the option that you like!
And so the final touch remained. Collar!
Step six.
You can replace the collar of the cape with a hood, just hem it and use the collar-collar.
Consider a collar option.
We cut out two parts with a length equal to the length of the neck, 10-15 cm high. Fold them with the front sides, make the edges planar, or maybe acute-angled, sew, leaving one long side of the collar unstitched. Let's turn it out. We apply to the neck - we sew.
Ready. Agree, the pattern of the cape is very simple, and your hands reach for the sewing machine !!
Also, for motivation, you can watch how to sew a beautiful poncho in a couple of hours. Good luck, joy and warmth !!
or here is another pattern 
A few more simple patterns 


and more capes 


 |  |
 |
How to sew a SUPER FASHIONable Cape Transformer for one or two times. Master Class
Cape transformer- this is the thing that should be in the wardrobe of every woman keeping up with the times! This piece is as practical as it is simple in cut.
No doubt, everyone can sew it in a maximum of 3 hours. Well, if you have ever held a thread and a needle in your hands, then everything will happen much faster.
 Cape pattern
Depending on what time of the year and with what you will wear the cape, the material and diameter of the cape are determined. Medium weight fabric with a content of 50% wool and 50% polyester would be the best option. For sizes 42–46 with a height of 170 cm, you will need a piece of 155 x 140 centimeters.
This is what the pattern should look like. The fabric should be ironed thoroughly before opening.

It will be easier to cut if you fold the pattern and fabric in half.

Virtually everything! If you have fabric that does not crumble along the cuts, then overcasting is not needed. If processing the cut cannot be avoided, and there is no overlock on the farm, then the edges can be bent or edged with something.

The point is small - to come up with what will be the quality of the belt at the waist. You can cut a wide strip of the same fabric and fold it in half to sew a belt, or you can pick up a wide leather belt that is contrasting in color.


As soon as they don't wear a Cape Transformer, just take a look!

The product is almost dimensionless: it looks gorgeous on any figure! To increase or decrease the size, you can slightly change the pattern by decreasing or increasing the diameter of the circle itself and the diameter of the armholes.
Your friends will be crazy about such a cape, share this article with them!
But even beginners will be able to boast of a do-it-yourself cape, because it can be based on an ordinary rectangular piece of warm fabric.
I fell in love with capes from the 2007 fashion shows. Although even then they did not seem like some kind of novelty in fashion. Rather, they reminded me of ponchos and capes that were fashionable even earlier. True, made of noble fabrics, the 2007 capes looked completely different, especially knee-length. In them, the women of fashion no longer resembled the Indians of South America, herding llamas on the wild mountain slopes. They did not look like shapeless "robes", on the contrary, evoked associations with aristocratic foggy London, corrosive Sherlock Holmes & Co ...
Simplest The way to sew a cape is to sew a rectangle of fabric on the sides and cleanly punch a hole for the head. From fabric in a large cage, woolen or brushed fabric, such a cape looks very stylish. A similar cape can be sewn from fur or fabric with a very large fantasy geometric pattern. If you pull the fringe along the bottom, you get an ensemble in the ethno style.
From feathers it is better to sew a short cape like a cape, so that the beautiful female forms are guessed in it. Instead of a cape or bolero - perfect for going out and parties.
Latest fashion trend: capes covering only the shoulders, reminiscent of royal robes, made of the fabric of the dress, the same length or longer than the dress.
Capes from fur- short-haired or long-haired, with a fur lining - a fashionable thing not only for the city. True, you will have to try when choosing other things for him, including accessories.
The capes are very comfortable and for relax: in them you can not just walk, but also go in for sports, including riding a bicycle or snowboarder.
You think, curvy women capes do not fit? That's not right - you just need to choose a model for your body type. Length can be the deciding factor here. With extra pounds for sewing a cape, you should choose not thick hard fabrics, but soft and flowing knitted and light woolen fabrics. Women with a figure type X it is worth trying on a cape with a belt, or leaving the waist in sight. Women with a figure type O it is better to choose straight, non-flared models.
Very short capes, which it would be better to call a cape, are easy to sew on your own using a pattern on our website. They can be worn over a trench coat or a narrow coat, but should not be worn over a thick sweater or puffy jacket - why do you need extra volume? These capes can be knitted. Knitted models are often worn over dresses and blouses instead of jackets and cardigans. Such capes can be decorated with collars made of the same or finishing fabric, or you can combine fabric and knitted fabric. By the way, in such mixes shiny satin and mohair are very effectively combined.
At all long capes look stunning. Of course, for an office, floor length is inconvenient - the width and thickness of the material does not allow you to elegantly select the hem when you step over the threshold or go down the steps of the stairs. But for appearances, such a royal cape is fertile ground for fantasy images.
By the way, capes will be good for home clothes- try replacing your dressing gown with a terry cape with bright trim or huge appliqués.
Capes are worn not only by women, but also by men. Men's capes they also sew from a variety of fabrics; for a brutal style, you can add leather details or sew a completely leather cape. For an aristocratic English bow, it is better to take a high-quality plain cloth or fabric in a dull cage.
Photo: PR; images / de; catwalkpix.com.
The material was prepared by Elena Karpova.
I have always admired people who know how to do something with their own hands, and I perceive the magic of turning a piece of fabric into clothes exclusively as a miracle. However, there are craftsmen who not only sew, but can also show and tell how they do it.
Designer Anastasia RomaNova kindly shared photos of a master class on sewing a cape - a cape coat fashionable this season.
You will need:
- any coat fabric, about 2.5 m. The author used cashmere.
Sewing machine.
Thread
Scissors
Tape measure
Chalk
Safety pins
Pattern.

Finished parts

Run a stabilizer stitch along the neckline of the center back and front to prevent parts from slipping.


Then iron out the seams. Process the allowances of open spaces (8 cm) from the front side by covering them with a width of 1-1.2 cm.

Stitch the back and front details along the shoulder cuts.

You should get the following.

Collar. The lower collar must be duplicated. Next, fold the lower and upper collar inward with the right sides, pin and grind 3 sides. Then cut off the allowances and turn the resulting collar inside out.

Iron the collar and sew a finishing stitch (1.2-1.5 cm from the edge).

Then the collar must first be injected, and then swept into the neck of the cape.

Stitching on the neck of the back and cape piping. Stitch the piping and hem at the shoulder seams, iron the seams. After that, it is necessary to process the inner cuts of the hem and the bottom cut of the facing.

Chip and welt the bead and neck edges.

Turn out the edging and hem and then connect them to the product using an adhesive spider web.

Iron well. Press hem allowance to wrong side.
Finish the bottom of the cape.

Place decorative stitching along the sides.

Belt. Stitch belt details on both sides, turn out and lay a decorative stitch (1-1.2 cm from the edge)

And now, the finished result.

Good luck in your work!
Photo from Anastasia's blog: a-romanova.blogspot.kr
We also recommend
 Rules for grinding and wet-heat treatment of garments
 Building a pattern for the basis of a dress: Italian technique as the easiest way to make a good pattern
 How to build a dress pattern base
 We model and sew coats!
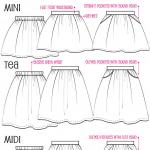
 Skirt of the year, construction of a pattern
 Fashionable children's skirts from old jeans - patterns and description