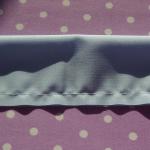
Coat with an openwork crochet spider pattern. Crochet spider pattern: features and scope of application Crochet lace pattern spider description of the pattern
Crochet Spider Pattern
The spider pattern is mainly used in light summer clothes because of its airiness. There are pattern options that are knitted from the corner, which allows you to make a shawl or bactus. You can experiment with the pattern by adding chains air loops and shortening the distance between the packs.
Navigating the article
Scheme
For knitting, you need to be able to knit air loops, as well as single crochet, with one and two crochets.

Description
VP- air loop, Sc- single crochet, CLO- a column with one crochet, CC2H- a column with two crochets.
Cast on 36 air loops (of which 3 air lifting loops).
1 row: 1 CCH in the 5th VP, knit CCH to the end of the row.
2 row: 3 VP lifting, 4 CCH (one per loop), 4 VP, 4 CC2H (each through one loop), 5 CCH, 4 CC2H (each through one loop), 5 CCH.
3 row: 3 VP lifts, 4 CCH (one per loop), 4 VP, 4 SBN (in CC2N of the previous row, one in a loop), 4 VP, 5 CCH, 4 VP, 4 SBN (in CC2N of the previous row, one per loop), 5 CCH.
4-5 row: fits like row 3.
6 row: 3 VP lifting, 4 CCH (one per loop), 1 VP, 1 CC2N (in the RLS of the previous row), 1 VP, 1 CC2N (in the RLS of the previous row), 1 VP, 1 CC2N (in the RLS of the previous row), 1 VP, 1 CC2N (in the RLS of the previous row), 1 VP, 1 CC2N (in the RLS of the previous row), 5 CCHs, 1 VP, 1 CC2N (in the RLS of the previous row), 1 VP, 1 CC2N (in the RLS of the previous row) , 1 VP, 1 CC2N (in the RLS of the previous row), 1 VP, 1 CC2N (in the RLS of the previous row), 1 VP, 1 CC2N (in the RLS of the previous row), 5 PRS.
To repeat 1-6 rows until the end of the work.
Video
We present a master class with a slightly different modification of the crochet spider pattern. Here, the openwork patterns do not go one above the other, but in a checkerboard pattern, which makes the pattern even more interesting.
Size: 40.
You will need: CoCo yarn (100% cotton, 240 m / 50 g) -1600 g white or of blue color, hook No. 1.75; 1.5. Attention! First knit the coat from the bottom up with a single cloth.
Crochet # 1.75 from one ball, take a long chain of 300-400 air. p. From the second ball, knit: 1st row - 3 air. n. lifting, 2 tbsp. s / n, * 11 empty sirloin mesh cells (1 empty sirloin mesh cell = 2 air p., 1 tbsp s / n, 1 filled sirloin mesh cell = 3 s / n mesh), 1 filled sirloin mesh cell, 11 empty sirloin cells, 6 tbsp. s / n *, * - * repeat 8 times, end the row with 3 tbsp. s / n. Tear off the thread from the first ball and tighten. Next, knit the "spider" pattern on 23 cells of the sirloin mesh according to scheme 1. In the 22nd row, knit 23 empty cells of the sirloin mesh. Then repeat the spider pattern from the 1st row. Having knitted up 2 rapports of the "spider" pattern, in strips from Art. s / n subtract 1 pt. 3 rd rapport of "spiders" also knit according to scheme 1. Having knitted 1 row of empty cells of the sirloin mesh, subtract in strips from st. s / n for 1 p. 4-5th rapports of "spiders" knit according to scheme 2, evenly decreasing in strips from Art. s / n for 1 p. - there should be 2 tbsp. Knit the 6th rapport of "spiders" according to the scheme 3. (The coat can be knitted shorter, in this case, do not knit the 1st and 2nd rapports of the "spiders", but immediately start with the 3rd rapport of the "spiders".) Then start knitting the waist, for this crochet # 1.5 along the top edge bound canvas dial 220 sts and knit st. s / n 33 rows, while in the 1st row, make reductions evenly - knit together every 11-13th p. Then divide 220 p. into 3 parts - right shelf, back and left shelf, mark with markers on both sides along 61 p.
Right shelf: knit st. s / n, at the same time, for a bevel of the neckline of the shawl collar, knit 3 sts together in each 3rd row. For the raglan line from the loop marked with a marker, subtract 1 time x 5 p., 1 time x 4 p., 2 times x 3 p., 3 times x 1 p. Next, from the armhole side, continue to knit 36 rows straight, and the bevel for collar, continue to knit until the end of the 36th row from the beginning of the right shelf = 29 p.
Left shelf knit symmetrically to the right.
Back: knit st. s / n, performing reductions in the same way as the shelves. Knit the remaining 84 sts straight - only 36 rows from the beginning of the back knit.
Sleeves: dial 63 air. p. and distribute the loops as follows: 1st row-3 air. p. rise, 23 st. s / n, 7 empty sirloin mesh cells, 1 filled sirloin mesh cell, 7 empty sirloin mesh cells, 24 tbsp. s / n. Next, on 15 cells of the sirloin mesh, knit the "spider" pattern according to the scheme 3. For bevels of the sleeves on both sides, add 1 sts in each 5th row. After 70 rows from the typesetting edge = 91 sts. To round off the sleeves on both sides, close 1 times x 5 p., in each 2nd row 1 time x 3 p., 1 time x 2 p., in each 4th row 5 times x 1 p., in each 2nd row 1 time x 1 p. , 1 time x 2 p., 1 time x 3 p., 1 time x 4 p., 1 time x 7 p. = 27 p. Cut the thread.
Assembly: complete the shoulder seams. Sew the sleeves into the armholes, follow the seams of the sleeves. On the right and left shelves, tie the strips with half-columns, on the left, make 4 holes for the buttons. Tie a shawl collar in shortened rows, without tying at the edges in 2 sts. Tie all the edges of the coat with a "crustacean step".
The crochet spider pattern has remained one of the most widespread throughout the world for many years. It serves for the manufacture of a huge variety of items: from clothes and bags to pillowcases and jewelry.
The reason for the popularity and demand for the pattern is that it is quite simple to calculate, it can be combined with other patterns, it can be easily increased or decreased, and can also be used to form vertical or horizontal openwork stripes.
Components of the pattern
Using the example of the diagram shown in the following figure, you can describe the formation of the main element of the "spider" pattern.

The ornament owes its name to the external similarity of the openwork part of each quadrangular element with a spider, whose legs stick out in different directions. These quadrangles can be very close to each other (as in the lower part of the diagram) or be scattered across the canvas (as in the diagram above).
The crochet spider pattern consists of the following components:
- Framing the pattern.
- Dense central part (spider's body).
- Chains of air loops (VP), which connect the frame with a dense center (spider legs).
Let's learn how to make this pattern.
Crochet spider pattern: the basic principle of education
The framing of the pattern is most often made up of "bushes": double crochet with common ground, it is also common to use four double crochet (CCH). The framing is placed in steps with a shift to the right or left:
- I p: one step from 3ССН.
- II p: two steps from 3ССН, between which there is an air loop.
- III p: the left step is shifted to the right, 3VP, a column with two crochets, 3VP, the left step is shifted to the left.
- IV p: right step with a shift to the right, 3VP, 3 single crochet (RLS), 3VP, left tread with a shift to the left. Further formation of a rhombus occurs with an increase in the distance between the steps. It is compensated by an increase in the number of RLS in the center of the element. The number of VPs in chains is always the same.
- V p: in this example, this row is the widest, here 5СБН. Further, the pattern provides for the convergence of the steps of the framing and a reduction in the number of RLS in the center.
- VI p: the right step moves to the left (the first CCH is knitted into the last CCH of the steps of the previous row, the rest - into the first VP of the chain), 3VP, 3SBN, 3VP, the left step is shifted to the right.
- VII p: right step, 3VP, column with two crochets, 3VP, left step.
- VIII p: two steps, between them 1VP.
- IX p: one step.
How to expand or shorten a pattern
This ornament can contain more rows. If desired, knitting after the 5th row can be continued to expand. To do this, the right step should be shifted to the right, and the left step to the left, while the number of air loops in the chains will remain the same (three), and the number of single crochets will increase by two in each row (seven, nine, and so on). Naturally, the crochet spider pattern will also include more rows in which the steps will move towards the center of the element.

To reduce the width of each diamond, it is worth stopping the expansion, stopping, for example, on the 4th row. In this case, the 5th row will include the offset of the right step to the left, and the left step to the right.
Practical knitting: a spider pattern in clothes
With the help of this ornament, craftswomen knit various summer products:
- Skirts.
- Blouses, pullovers and blouses.
- Dresses.
- Scarves, shawls,
A shawl with a "spider" pattern is easiest to knit from corner to wide edge. In this case, the canvas will constantly expand on both sides. Adding loops is quite simple: when you move the steps at the beginning of the row, additional VPs are recruited, and at the end of the row, each double crochet is knitted from the base of the previous one.
Good afternoon friends!
The openwork crocheted bedspread with a "spider" pattern has been deservedly awarded the attention of many needlewomen from my group in classmates. Someone has already started knitting like this. And although there is a diagram for it, I thought that it would not hurt to make a description.
Once upon a time, as an aspiring knitter, I came across the idea of a pillow tied by a spider. Then I could not figure out how to knit such a pattern. Therefore, I decided now that my small master class may be useful to someone.
Knitting an openwork bedspread with a crochet spider pattern
Crocheting an openwork coverlet according to the pattern with the description will be quite simple, in fact.
Many people will also like this bedspread because it is knitted with a single piece and there is no need to sew motifs.
From what yarn to knit and how much it will be required, the source where I found this picture did not say.
I find acrylic or cotton for the bedspread. And the yarn will need about 2.5 kg, a little more or less depending on the thickness of the yarn and the size of the bedspread.
As always, we select the hook for the thickness of the yarn, and I also advise you to knit several samples with hooks of different thicknesses and see how you like it best.
How to crochet a blanket
First we link spider pattern swatch.
We collect 43 VP.
1st row: 3ВП, С1Н, 3 times with 3С1Н in every third loop of the chain, 13 ВП, 3С1Н in the 6th loop, 4 more times with 3С1Н in every third loop and repeat the pattern again, at the end of row 2С1Н in last loop chains.

3VP, we turn knitting.
2nd row: 3 times in 3С1Н between the columns of the previous row. (as when knitting), 6VP, 1 RLS under an arch of air loops, 6VP, 4 times 3С1Н, repeat the pattern.

3rd row: if you look at the diagram, we see that the number of double crochet groups decreases, and the spider grows.
3ВП, 1С1Н, 2 times 3С1Н, 6ВП, 3СБН, 6ВП, groups of double crochets and so on.

4th row: 3VP, 2 times in 3С1Н, 6VP, 5СБН, 6ВП, 2 times in 3С1Н, we repeat the pattern.

5th row: 3VP, 1S1N, 3S1N, 6VP, 7SBN, 6VP and further according to the scheme.

6th row: as 4th.

7th row: as 3.

8th row: as 1.

Then the pattern can be repeated from the 1st to the 8th row.
Do not pay attention that the sample is a little crooked, after ironing it takes on a normal shape.

Even according to the sample, you can already see what a beautiful bedspread can be knitted. However, a sofa bedspread will do just fine.

I made a video with a master class on how to knit such a pattern for a bedspread.
Calculation of the loops for the bedspread
When starting to crochet a bedspread, you don't need to calculate the loops. I do the following.
I put on a chain of air loops, approximately equal to the width of the future bedspread.
To knit the first row, take another ball and start knitting from the beginning of the chain, not from the end. We do not break the thread from the first skein yet.
Thus, having knitted the first row, it will be possible to more accurately determine the width and, if necessary, tie the chain or dissolve it.
Crochet blanket edge decoration
According to the scheme, it is proposed to tie the finished bedspread with several rows of single crochet along the entire perimeter, although this does not seem to be in the photo. But I think that the tied will look better, neater.
Attach long brushes around the edges if desired.

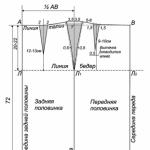
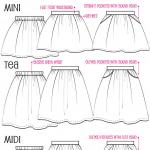
We also recommend
 Rules for grinding and wet-heat treatment of garments
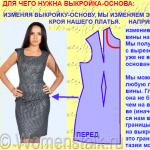 Building a pattern for the basis of a dress: Italian technique as the easiest way to make a good pattern
 How to build a dress pattern base
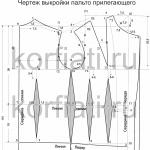 We model and sew coats!
 Skirt of the year, construction of a pattern
 Fashionable children's skirts from old jeans - patterns and description