Funny toys with your own hands. DIY soft toys - choice of materials, creative ideas, fresh photo examples
Making soft toys is an interesting creative process that is exciting not only for adults, but also for children. To make the toy really beautiful, you need to put a little effort and imagination. Especially for you, we have made a selection of 15 inspiring ideas on how to make a stuffed toy with your own hands. Use them and your neck with pleasure!
1.Fun company
Make your child happy fun company cute stuffed toys. You can sew them yourself or together with your baby. You need a fleece to work different colors, filler, eye beads and a piece of leather to make a voluminous spout.
You can print the pattern of the toy or, by enlarging it on the monitor, attach a sheet of paper and circle it. Next, transfer all the details to the fabric and pay attention that you need to cut out two blanks for the body, four for the legs, you will also need two white circles for the eyes and one leather for the nose.
First, form the legs, using two blanks for each, sew them to one of the base parts. Now we sew the torso from the wrong side, leaving a small gap in the lower part. We turn it out, stuff the toy with filler and sew up the hole with a blind seam.
Now we sew all the details of the face, as shown in the photo. To form a voluminous spout, you need to go around the edge of the leather mug with a needle and thread and tighten it tightly, fill it with filler. The mouth can simply be embroidered. Our wonderful toy animal is ready! Use the patterns below and make a whole company for your baby!


2. Mustache-striped
Probably, there is no child who would not be delighted with the playful faces of cute kittens. But not every mother is ready for a heroic deed - to have a live pet in her apartment.
Sshey funny toys made of fabric, stuff them with cotton wool, padding polyester or filler from old pillows. Add accessories of your choice, for example, a scarf for a cat or an openwork bow for a cat.


3. Owlets-pillows
Decorate decorative pillows baby's room. They can be sewn in the form of cute owls - your baby will happily go to bed surrounded by such a company.
Making such a pillow toy will not take much time - redraw the pattern correctly, sew the details and fill it with a soft "filling". Next, shape the face with big curious eyes.


4. Smeshariki
Smeshariki are favorite cartoon characters of many children. Settled in the nursery of the Funny Krosh, the coquette Nyusha, the brooding Hedgehog and other "round" animals, sewn with their own hands - your child will be immensely grateful to you.
Choose fleece of different colors - preferably, such as in the cartoon, because your child is used to perceive the characters of the cartoon just like that. For eyes and noses, you can use beads, buttons, or fabric. Don't forget the accessories! For example, little Nyusha can come up with a bow, and the Hedgehog will not do without glasses.


5. Soft toy "Bunny" from a sock
A gorgeous bunny can be made without spending much effort. For work, you will need a regular sock, several thin elastic bands (you can use a thread), scraps of white and black fabric to decorate the face, a ribbon for a bow and a pom-pom tail.
Divide the sock into three parts. Two of them - the torso and the head, fill with filler and tighten with an elastic band. Cut out the ears from the rest of the part and sew the edges. Now we cut out the details of the face and glue it on. It remains to sew a pompom-tail and decorate the neck with a bow. The bunny is ready!

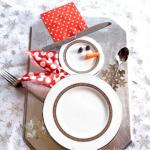
6. Snowman
In a similar pattern, you can make merry snowmen out of socks, which will be excellent room decorations for the Christmas holidays. They can be placed on cabinets, shelves, or a Christmas tree.


7. Little elephants
Sew a little felt elephant - turn it into a keychain or decoration for a child's backpack. Many multi-colored elephants will become a real decoration of the nursery, if you form a garland out of them!
Using a pattern, sew the main workpiece and separately the ears. Fill all the details with padding polyester and patch up the holes. Clip the details together and add a pair of eyelet beads. To get a pendant, do not forget to sew in a loop - for this you can use a narrow braid.


8. Chicken basket
Using felt, you can sew a wonderful voluminous chicken. Put "kinder" or sweets in it - you will see how much joy such a gift will bring to your baby! And also, the miracle chicken can be used to decorate Easter table or baskets, filling it with dyed eggs.


9. Little mouse
A cute little mouse will become a suitable toy for a child under one year old. It will be conveniently placed in his handle, contribute to the development of tactile sensations.
Pick up brightly colored scraps and contrasting yarns. Sew all details from the outside with a buttonhole seam. Especially securely attach the eyes and bead nose to the body so that the baby cannot accidentally tear them off.


10. Baby hippo
For some unknown reason, these representatives of hot Africa are rarely found among children's toys, but kids really like these cute creatures. You urgently need to correct this flaw. Prepare thick cotton fabric of different colors, filling and get to work urgently!
It is better that the fabric for the torso and legs differ in color - this will make the toy look funnier. For the eyes, use beads, buttons, or get ready-made in the store for creativity. Don't forget the small piece of ponytail tape.
Form the legs first, stuffing them with filler. Now you can start collecting the toy - during the formation of the calf, you need to simultaneously sew in the legs, stuff the toy, arrange the muzzle and tail. Such a wonderful hippo will certainly delight your child!


11. Polar fleece bear
To make a teddy bear, it is better to use fleece - this is the softest and most pleasant to the touch material. Additional details in the form of ties, butterflies will give the toy a particularly stylish look.
The details of the pattern can be easily adjusted, making the toy lower or taller, thin or full. Nevertheless, we recommend leaving the arms and legs long, as shown in the photo - then your baby can play with the bear in a hug.


12. Tilda's dwarf
Tilda's toys have a special charm. Looking at them, it is as if you are plunging into the atmosphere of a cozy village life of the past centuries. If you make a toy as a fairy-tale character - a gnome, it will always give a feeling of fairy-tale magic.
The pattern in the photo shows how to make a wonderful company of Christmas gnomes that can be placed under a tree or on a fireplace. It is better to take a flesh-colored material for the "body". If this is not available, pre-hold the fabric in a light brewing solution and dry it.
It is better to sew clothes for gnomes from bright materials and do not forget about a cap with a bell - after all, it is the main sign of a real gnome!


13. Fur puppy
This soft fur toy will be especially warm and beautiful. It is not necessary to use natural material – artificial fur is also quite suitable, especially since it is much easier to work with it.
Make sure the fur is in the correct direction when cutting out the details. You will need some more fleece to decorate the inside of the ears and the mouth of the dog. All parts of the toy must be filled with padding polyester and sewn. On the face, make a tie with a thread, as shown in the photo, to give it a realistic shape.
When the puppy is completely ready, you can add an ornament in the form of a neck bow or a bright leash.


14. Hedgehog made of fur and fleece
This toy will be made of two materials at once - the belly and legs from fleece, and the fur coat from fur. Transfer the patterns to the fabric at the desired scale, make patterns.
The fur coat and the abdomen will be formed in two parts to make the hedgehog as voluminous as possible. All details must be filled with padding polyester or scraps of fabric. Now it remains to attach the handles and legs that have been sewn in advance and arrange the muzzle.


15. Funny trio
Three soft toy representatives of the zoo will take their rightful place among your kid's favorites. To make these cute toys with your own hands, you will need a minimum of materials and time.
Use patterns and colorful fabric. The details of the muzzle can simply be embroidered or drawn with a marker.
If you want to involve children in work, entrust them with making a toy whale. It is so easy to do that your child can easily cope with this task, and the result will delight the whole family!


Making a toy with your own hands is not difficult. This does not require any special knowledge and skills, your desire and irresistible craving for creativity is enough. By turning on your imagination and imagining a little, as well as using our recommendations, you can create a beautiful and original version toys for a child, a pet, create an unusual element of interior decor.
Stuffed Toys
You can sew an interesting stuffed toy without spending money on the purchase of consumables at all, since they can be found in every home. Examine the photos of homemade toys, and you will understand that for their manufacture it will be enough to use the available means: fabric, threads, a needle, buttons and any printed material.

So what kind of stuffed toy can you make yourself at home? The easiest option is a sock bauble. Surely in any apartment there is a nice colored sock.


With the help of this product, you can make a funny caterpillar, a cute dog, and a plump pig. More complicated options - toys, sewn from cuts of fabric, fur, using patterns, knitted from yarn or made using the felting technique.

Sock bunny
Let's analyze the instructions on how to make a bunny toy. Prepare scissors, sock, buttons and padding. The bottom of the toe is neatly cut. After the sock is turned inside out, an incision is made from the bottom of the product to the "heel".

Each of the obtained "ears" is stitched with a thread. After that, the product is turned inside out and stuffed with padding polyester or any other stuffing material.


The top of the sock, as well as the bottom, is cut with scissors. The incision is 2 to 3 centimeters. Thus, we get the legs of the bunny. They are stitched with inside, stuffed with padding polyester and sewn up completely. The cut obtained at the very beginning is cut in half, from these parts the "legs" of the hare are twisted and sewn to the body.


Felt dog
The technique for performing this version of a soft toy is a little more complicated. So how to make this toy at home? You will need:
- felt in three colors (brown, black and white);
- beads or buttons for the eyes;
- scissors;
- pattern;
- needle;
- threads;
- hot glue gun.

To begin with, find a pattern that is suitable in shape and size, print it out or manually transfer it to paper, then cut out every piece of the toy from the fabric. Sew the cut out pieces one at a time, filling them with padding. After that, connect the resulting parts of the dog's body together: the muzzle, ears, paws, tail, torso.

Cut out two spots from white felt, which will decorate the puppy's face, from black felt, cut out a nose. Further, using a glue gun, or using threads, you need to attach these elements. After that, button eyes are sewn.


The toy is ready! The dog can be decorated with a ribbon, a beautiful bow or a collar string and used as interior decoration or for playing with children.

Rubber toy
Today, you can find small thin elastic bands of all colors of the rainbow on store shelves. Intertwining them together, using a special technique, you can make interesting small toys that children will certainly like, and can also become a decoration for a Christmas tree or be used as a keychain.


In order to fully master this technique, we advise you to watch a master class on how to make a toy with your own hands. Seeing the weaving method with your own eyes, you can easily repeat all the necessary steps.

Let's figure out how to make a bouncing ball using rubber bands. You will need:
- a small piece of cotton wool;
- about 100 colored rubber bands.

The sequence of actions is quite simple: cotton wool rolls into a circle, and elastic band after elastic is put on it, step by step, in two turns.

After the ball has increased in volume, the rubber band can no longer be twisted, but simply pulled from above. The more rubber bands you use, the larger the bouncing will be.


Pet toy
DIY toys for cats and dogs are very popular. Making a funny trinket for a pet is not difficult at all, and by making it from scrap materials, you will save a decent amount of money.

A wine cork toy for a cat will be an interesting idea. You can take several corks and decorate them in different ways: crochet one, attach several ribbons to the second, rustling papers, candy wrappers to the other. Such a funny trinket will certainly please your pet.

Using a needle, it is easy to sew a felt toy for your pet. So, for a kitten, excellent option there will be a felt fish, for a small dog - a soft bone. To do this, two identical parts are cut out of the fabric, sewn together and filled with padding material. In just half an hour you can make an interesting toy that will keep your pet busy for a long time.

As you understood, make soft and paper toys for children, funny knick-knacks for interior decoration, interesting things for pets - quite simple. The creative process will certainly bring you a lot of pleasure, this interesting activity will not leave indifferent either an adult or a child.

DIY toys photo


Toys accompany us throughout our lives. In no case should they be considered an attribute exclusively childhood, and to a greater extent this applies to soft toys, especially those made by hand. She can be a memento stylish decoration interior, a cozy sofa pillow, a symbol of love and friendship.
It is pleasant not only to receive a soft toy made of fabric as a gift, but also to create and give. Better than any words, she will tell about the attitude towards the person being gifted, because not only personal time was spent on its production, but also a piece of the soul. Learning to do it is not difficult at all.

What you need to make fabric toys
Prices for fabrics for needlework
To create a soft toy, you need very little: fabric, filler and decor. The most suitable fabrics are those that do not slip in the hands and do not crumble at the cut. It:

As for the filler, traditionally fabric toys are stuffed with foam crumbs. padding polyester, padding polyester or holofiber. They are lightweight, voluminous, they are not afraid of moisture, toys with such a filler can be washed.

Filler - balls
But there are other options, especially when it comes to a child's toy. It can be filled with balls of polystyrene, which is sold in hardware stores as an additive for light warm concrete. And also with polypropylene granules. Or any cereals, such as rice, barley or beans. The grains of this filler, rolling under the baby's fingers, contribute to the development of fine motor skills.
Another non-standard filler option is thin disposable food pouches. Of course, not coiled up, but crumpled.
Advice. If you make a toy from several parts and fill each of them different materials, you will get an excellent simulator that develops not only motor skills, but also imagination and hearing. After all, each of them "sounds" and is felt in its own way.
Decorating ready-made toys is possible not only with special accessories - eyes or noses.
All sorts of improvised materials are suitable for this: buttons, beads, ribbons, cords, floss threads, etc. Everything here is limited only by the author's imagination.


In a word, everything you need to make a fabric toy can be found at home without buying materials on purpose.
This also applies to tools: in the absence of a sewing machine or skills in working on it, it is quite possible to do with a needle and thread. In addition to these, it is a good idea to have scissors, pins and glue on hand.
Sewing machine prices
Sewing machine
Read on our website about. Detailed instructions and creative ideas!
Patterns
A pattern is a drawing, a project of a future toy. Without it, you can only sew a pillow.

If you want to get something more interesting, you need a sketch of the future product and a pattern in real scale. You can come up with and draw it yourself or spy on the idea on the net or in a needlework magazine. More options:
- gently rip old toy and circle all the details;
- buy a ready-made set with a pattern and everything you need in the store, including instructions for making;
- find a suitable picture in the book and redraw it, increasing the size to the desired one;
- take any of the patterns below.

Soft toy - cat

* Click on a pattern to enlarge!
Advice. If you plan to create several toys one by one pattern, then it is better to do it not on paper, but on cardboard.
Several master classes for beginners
The algorithm for making a toy from fabric is simple and the same for any model.
- pattern creation;
- transfer of the pattern to the fabric. In order not to do unnecessary work, the fabric is folded in half to cut out paired parts;
- cutting out fabric blanks with seam allowances;
- stitching parts on the seamy side, while leaving a small unstitched area;
- turning the blank onto the front side and stuffing with filler through the hole left;
- sewing up an unstitched area with a blind seam.

The finished toy will only have to be decorated, embroidered or sewn on the necessary details.
Video - Master class: how to sew a cat and a cat with your own hands. Simple toys
Little bird
Let's start with the simplest thing - making a bird. Depending on the size, it can be just a toy, a cushion, or a Christmas tree decoration.
| Stage | Description |
|---|---|
| We prepare scraps of fabric, threads, scissors and a pattern. You can draw the contour of the bird yourself, highlighting only the head with a beak and a tail. The abdomen is left straight without curvature. |
| We circle the pattern on the fabric folded in half, cut out and sew along the line. We turn out the workpiece and manually quilt along the lower cut. | |
| We fill the bird with filler and tighten the stitching thread. Sew or glue a small circle of dense fabric to the assembly site. |
| Sew on beady eyes and wings cut from the same fabric as the abdomen. |


It will be a pleasure to receive such a gift for Valentine's Day or birthday. Anyone familiar with a sewing needle can make it.

It is better to take the fabric not too variegated, but bright. And if you do not one cat, but two, then a contrasting one. You will also need floss threads for the mustache and noses embroidery, beads for the eyes and some decor.
Step 1. Enlarge and print the suggested pattern or draw your cat. For clarity, you can immediately add a muzzle and decorations to him to present the result.

* Click on a pattern to enlarge!
Step 2. Fold a piece of fabric of a suitable size in half with the right side inward, place the pattern on top of it, and trace around. Sew both layers of fabric along the outline. To prevent them from moving, you can split the fabric with safety pins in several places. In the tummy area closer to the tail, leave a few centimeters unstitched.

Step 3. Cut out the resulting workpiece with sharp scissors, retreating from the seam no more than 1 cm. Sew the workpiece, leaving a 5 cm area unstitched to turn the fabric.

Step 4. Turn the cover over your face through the unstitched area and iron the seams. Fill it with padding polyester or other light and soft filler. A long wooden stick, pencil, pen or knitting needle can help fill in hard-to-reach spots and small details.

Step 5. After stuffing and distributing the filler evenly, carefully sew the hole with an invisible seam to match the fabric.

Sew beads or small round buttons on the legs in place of the eyes. Use contrasting threads to embroider the nose and mustache. The rest of the decoration is at will and possibilities. Heart-shaped buttons will support the gift idea.

For a cat, you can make a tie, for a cat - a bow or a lace bib. If the gift is intended for a spouse or family of friends, in addition to adult cats, you can sew small kittens using the same pattern.
This toy is sewn from several parts and fabrics of different colors. Which, however, does not make its manufacture more difficult than the previous model.

The choice of fabric color is arbitrary - it is not necessary to make the legs green, and the shell brown. But the texture is better to choose soft and pleasant, since this flat toy will most likely be used as a pillow.
Step 1. We prepare the patterns and transfer them to the fabric. You should get: four paired parts for the legs, one paired part for the tail and head, one round part for the abdomen and shell. The latter should be made slightly larger than the abdomen. We cut out all the blanks from the doubled matter, pre-chipping it with needles.
Step 2. We are finalizing the blank for the carapace, sewing up symmetrical darts on four sides so that it turns out to be convex. The depth of the darts should be such that the diameter of the finished part is equal to the diameter of the workpiece for the abdomen.


Step 3. Sew together small parts of the head and paws in pairs, sewing on the end cut, and fill them with padding polyester. We sew a triangle for the tail, but leave it without filler.

Details of paws, heads
Step 4. All the details, except for the tail, are distributed around the circumference of the shell sewn to the abdomen and sewn with a blind seam.

Step 5. We fill the body of the turtle with filler through the hole left in place of the tail. Then we sew the tail itself.

Step 6. We embroider the eyes with black threads or sew on suitable buttons in their place.
Embroidery - eyes
Simon's cat
There are a lot of images of this beloved cartoon character on the Internet. You can take any pattern to create a pattern.
And just enlarge and modify it to get such a funny cat.
Or use finished pattern suggested here.

Copy it, enlarge it to the desired size and print it on a printer. All details are paired. If you use a stretching fabric, then you need to place the pattern on it in accordance with the arrows drawn on it: it should stretch in the indicated direction.
Advice. The simplicity of manufacture and the popularity of the character will certainly motivate more than one such cat to sew. Therefore, it is better to immediately make the pattern on cardboard or thick craft paper.
Step 1. We start as usual: fold the fabric in half with the front surface inward and pin it with pins. Then we outline all the details of the pattern cut out of cardboard. Since the fabric is white, it is best to use a helium pen, felt-tip pen, or highlighter for stroking.

Step 2. Without removing the pins or cutting out the details, we sew them entirely along the drawn contour, leaving no gaps and especially carefully going through small details. When sewing by hand, the seam on the feet must be made as small as possible so that each finger is identified. There is no need to sew round parts - these are separate single blanks for decorating the eyes. You just need to cut them out.

Step 3. We cut out the cat, stepping back from the seam by 3-4 mm. We make transverse cuts between the fingers and ears almost to the seam line, otherwise, after turning out, the fabric in these places will stretch and the contours of small details will be indistinct.

Step 4. We make neat cuts on the fabric in two places: in the place of the eyes in front and the tail in the back. Through one of them we turn the workpiece onto the face, helping ourselves wooden stick when you need to straighten the tail, ears and legs well. And fill it tightly with holofiber or other synthetic filler. In the area of small parts, add the filler in small portions so that they are completely straightened and smoothed out.

Step 5. Sew up the slit on the muzzle, and sew the tail filled with holofiber to the back slit.


Step 6. We embroider the pads on the legs with black threads and mark the fingers.
Step 7. With thick black threads in two folds, sew two round details in place of the eyes with a seam "back to the needle". We leave a small gap in which we place the filler, giving the eyes a convex shape. Then we finish the seam. Sew on the pupils from black beads and embroider the triangular nose and mouth with the same threads.

That's it, the toy is ready and can be a great gift or decorate the interior of a bedroom, children's room or living room.
Another way to make Simon's New Year's cat


If you tackle right away big toy scary, you can practice on small patches, making cute Christmas decorations and baby toys.
The ideal material for quickly filling your hand is felt. It can be hand sewn over the edge or any other simple stitch using contrasting thread.
Toys can be made not only printed, but also flat, choosing the most simple forms: Christmas trees, hearts, stars, mushrooms, etc. Decorate them with embroidery, rhinestones, sequins, tinsel. And a loop is sewn to the top for hanging on a Christmas tree.
By the way, such small toys can also be sewn for a child's mobile.

Video - How to make a mobile
Video - We sew a unicorn together from felt
Sewing fabric toys is a very exciting activity. It is liked even by those who, in principle, do not like to sew. After all, you need to do just a few stitches, and everything else is an inspiring process of shaping a flat product and its "revitalization": coming up with character, expression of the face and outfit.
Video - DIY toy basket
Stuffed Toys do it yourself: ideas + patterns
Let's delve a little deeper into this fascinating process and find out the technology of sewing soft toys. They are the easiest to make and the most requested. To make a toy with your own hands, you should pay attention to the color of the fabrics. They should be bright and cheerful and pleasing to the eye, you can combine several shades. If you don't have the right colors at home, you can dye the fabric yourself, for this you need to purchase special dyes.
Their choice should be taken seriously, because they will be in the hands of children and the dyes should be natural and not shed. It is necessary to cut out the fabric very carefully and carefully be sure to monitor the same sizes of paired parts and full correspondence of the sides.

And for those who dream of playing real games, I recommend the site http://mygame-s.ru. There are interesting games for boys and girls here that will be useful and a lot of fun.
This is not only a race, but also a lot of interesting games of different genres, as well as games based on famous cartoons and films. The mygame-s.ru portal will help you find your favorite entertainment and play them online!

Before processing the pattern on sewing machine first, it must be processed with a buttonhole seam. If the fabric is loose, leave seam allowances. When the pattern is ready, you can fill it with various materials.
The most affordable and popular is the synthetic winterizer. Such toys can be washed in a typewriter, they dry very quickly and do not lose their shape. Toys can also be stuffed with synthetic fluff (these are soft small balls). It does not roll and also tolerates washing very well.
If you do not want to spend extra money on buying fillers, there are several options:
1. Remove fillers from old blankets or pillows that you will no longer use.
2. Stuff the toy with small pieces of soft tissue available at home. Before you start sewing a toy, you need to know what will be needed to create it: - fabric of different strengths and colors;
Sintepon, cotton wool, foam rubber, and other substitutes;
Buttons and beads for the eye and nose;
Sewing tools;
Ruler, pencil and paper for patterns.
For the right choice the fabric from which the toy will be sewn, you need to know their properties. For example, jersey stretches well, you can sew any toy from it. Cotton fabrics are also suitable for different types, but toys are harder from them. Mahra is perfect for toys where wool imitation is needed. A teddy bear, bunny or chanterelle can be made of velvet velor or wool, such a fabric will do its job perfectly. From felted fabric, creative and original toys... But still, it is more suitable for the manufacture of additional parts, such as legs, ears, nose, and so on.
Patterns of soft toys:
1.
2.
3.
4.
5.
6.
7.
8.
9.
10.
11.
12.
13.
14.
15.
16.
17.
18.
19.
20.
21.
22.
23.
24.
25.
26.
27.
28.
29.
30.
31.
32.
33.
34.
35.
36.
37.
38.
Useful Tips
This soft toy good gift child, and if you make such a toy with your own hands, then there will be many times more joy and satisfaction.
Follow the tips, use your imagination and create your own stuffed toys that will delight you and your children.
DIY soft toys. Matryoshka.

Such a doll is very easy to sew, so it has become popular among lovers of making a stuffed toy with their own hands. An experienced craftsman will be able to make a tilde doll in less than an hour. You can involve children in the process - they will definitely be interested.
1. You can use a tilde cloth for a more colorful effect. But if you have not found a similar fabric, then two pieces of cotton of different colors, dense calico or satin will help you.
2. Sew one piece of cotton with another and iron with an iron.
3. You can use the printer to print the pattern or draw it yourself to the size you want.


* In this example, the matryoshka doll pattern is shown for three sizes, namely large, medium and small.
5. Now you need to sew the fabric along the previously drawn contour. In doing so, you need to leave a hole at the bottom. It remains to cut and turn out.


6. Prepare a white cotton cloth to paint your doll's face on. Now cut out and glue on the spider web to the matryoshka.
7. Using acrylic paints and a thin brush, you should paint the portrait, and after the paints have dried, sew the doll's face along the contour to the main part using a decorative stitch.


* If you sew this doll correctly, then it will be able to stand on its own. Pay attention to the images to understand how to sew and wrap the bottom corners inward, thereby creating a stable rectangle for both toys.


How to sew soft toys with your own hands. Photo lessons.
Baby

As in the previous example, this doll can be sewn with your own hands pretty quickly. Despite the fact that the soft toy immediately turns out to be dressed, you can come up with separate clothes for it so that you can change it.

It is advisable to use soft but durable fabrics. In this example, the toy is made using American flannel and jersey. The growth of the "Kid" is 27 cm. The arms and legs were attached with the help of a button fastening.
Snake

The pattern of this toy is not at all complicated, but if you pay attention to the images, you can see how the toy was cut in a spiral and sewn using an external decorative seam.
The view from the back is beautiful and simple.

It is advisable to use bright fleece or felt. Then you can decorate the stuffed toy with colorful circles, flowers, etc.


Elephant

In this photo tutorial, you can learn how to sew an elephant out of a sock. You will need 2 pairs of warm socks for this stuffed toy.


The sun is a little animal

The name of the toy may sound a little strange, but it cannot be denied that the product itself is very cute and children will love making and playing with it.


DIY soft toys (video)
Make a stuffed toy with your own hands. Kitty.

Such a bright, soft cat can be used not only as a toy, but also as a pillow.
1. Prepare a special tildo fabric, or thick cotton that does not fade or shrink after washing.

The main part of this toy is easy to sew - just circle along the pattern, sew along the contour and cut with zigzag scissors so that the fabric does not wrinkle when you turn it out.
2. Making a muzzle

2.1 Take a close look at the image to see where to fill with filler. Next, you need to sew up and decorate.
2.2 Cut out an oval for making the face. Sew the muzzle with threads and then make petals for the face, which then need to be turned out and sewn along the contour of the oval - this must be done from the inside.
2.3 The entire structure prepared in paragraph 3 must be sewn from the main part of the toy cat.
3. Making a flower


3.1 First you need to cut the petals for the flower.
3.2 The cut petals need to be folded, turned out, and a fold should be made at the base. After that, just sew them together.
3.3 In the middle you need to attach a button trimmed with fabric and decorate the head of the cat (see the picture).
* To make the ears more voluminous, you can use a thin synthetic winterizer.
This is how you should do it.
This is a tilde pattern

This is the second half of a toy cat

How to sew a stuffed toy with your own hands. The bear is a midget.

Unlike previous soft toys, this bear is not very easy to make, but the result will pleasantly surprise you.
To make this toy you will need knitting needles # 2.5 and 100% acrylic threads (100g - 230 meters).
1. Prepare a thread in the color of the dress of the toy (in this example, the color is red) and begin to cast on 20 stitches. It is worth noting that the first loop of the row must always be removed, and the last one must be knitted with a purl, while tight knitting must be done.


Structure:
Rows 1 and 2 - knit all - thread color: red
Row 3 - Purl All, Start Typing white thread and alternate colors: the loop is red - the loop is white.
Row 4 - knit all - thread color: red.
The next 6 rows need to be knitted with the front stitch.
Row 1 - Purl All - Thread Color: Beige
Knit the next 8 rows with a beige thread (wrong side with purl loops, and front side with front loops).
2. Now all the loops need to be collected on the auxiliary thread. At the same time, pass another auxiliary thread where the red and beige thread meet (seamy side - see image).

3. The face must be embroidered with a dark thread. Prepare a backing cloth and cut a small diameter circle out of it.
4. Prepare the band on which you want to hang your toy. Tie a knot at the bottom of the ribbon and secure it to the toy. Next, you need to pull off the upper auxiliary thread.

5. Making the ears of the bear. First you need to cast on 3 loops. Knit once and close the loops.
6. We attach the ears to the head of the toy. Use a needle and thread to knot inside the toy.
* To make the neck, thread and pull the thread between the bear's head and his dress.
7. We make the arms and legs of the bear in the form of a cord. Cast on 4 stitches using 2 knitting needles and then knit 6 rows in a circle.
* Who does not know how to knit in a circle, watch the video tutorial below.
8. Loops at the end need to be collected on one thread, namely the one with which you knitted. Next, using a needle, pass through the limb to the first thread, thereby two threads will be next to you. You need to make 4 pieces of such blanks.
* If you want to make the handles more neat, try to thread them tightly into the body, and tie the threads together with a tight knot.
9. It remains only to fill the head and body of the bear with filler, and sew on the back along the seam. The handles must be attached to the dress and a knot must be made inside the toy, and the legs, along with the hem of the dress, must be sewn at the bottom.
DIY soft toys. Flying cat.

Such a cat can be easily sewn and painted at home, while using a small amount of materials.
Prepare a piece of plain light colored cloth (its size depends on the size of the toy).
1. The image shows a pattern. You need to make a tail, a foot, a half of a muzzle, and a torso.


2. Using a simple pencil, trace all the details on the fabric, attaching them to the fabric in advance. Small parts can be sewn right on the main piece and then cut out. You will need: 2 legs, 1 tail, a back with a head, a belly without a head and the muzzle of a future plush cat.
3. Sew the middle of the toy's face and cut it out.
4. Sew the ponytail and feet, making sure to leave a small hole where you want to make a straight seam. Next, cut out the back and tummy.
We also recommend
 Happy birthday pictures for women
 Happy birthday daughter pictures - congratulations Download a beautiful card happy birthday daughter
 Happy birthday to the fisherman Happy birthday to the fisherman
 Beautiful animated cards Happy Birthday (GIF)
 Good morning - funny pictures download
 How to decorate a New Year's table Decorate a table for the New Year