DIY soft toys patterns for Easter. Fabric bunny eggs for the spring holiday
This review article "Cross" is dedicated to everyone who loves Easter and wants to prepare for it in advance. In recent years, we have written and published more than 20 master classes on how to create DIY Easter crafts. To make it easier for you to navigate in all the variety of ideas and choose those crafts that you want to do for Easter this year, we offer you a list of all our Easter articles and master classes.
We must start, of course, with the largest and most complete article about, in which there are about 64 great ideas! Here you will also learn about the history of the holiday, as well as how to make Easter eggs (we disassemble in detail all the existing blanks for creating decorative eggs) and rabbits, baskets and candles, napkins and postcards for Easter. The article includes photo and video master classes, as well as many photos with ready-made crafts that will inspire you to be creative. 
Perhaps, after looking at the above article, you will have already decided on the choice of crafts. But do not rush, and suddenly new master classes will inspire you even more!))
Decorating Easter eggs
Let's start with DIY Easter eggs. The easiest way to decorate an egg is decoupage. You can make decoupage on boiled eggs and consecrate them in the church, you can use empty eggshells or wooden blanks. The choice depends on whether you want to save the made souvenirs or just decorate eggs directly for the festive table. The DIY Easter egg decoupage article will answer all your questions regarding this technique.

The next way to decorate an egg is also pretty simple. As a basis, you can take any blank in the shape of an egg (even wooden, even plastic, even foam), but the author offers his own unique way of creating a blank - from polyurethane foam!

The next master class combines decoupage and gluing the blank with a decorative cord, but the result is strikingly different from the previous ones! See for yourself by looking at MK Easter egg decorated with napkins and jute.


One of the most difficult ways is to braid an Easter egg with beads. But he is also one of the most beautiful, your efforts will not be in vain!

And since we are talking about Easter eggs, it is worth paying attention to another very interesting idea - an Easter wreath on the door, made of eggshell and natural materials. They can be used to decorate the front door or any other door in the house, or they can simply be hung in the kitchen, for example, next to the festive table.

Easter bunnies
It has become customary that rabbits, along with eggs, are also considered Easter souvenirs. There are also many techniques for making Easter bunnies. In the article Easter bunnies that bring good luck! you will find out where the tradition of making rabbits for Easter came from, and also watch master classes on creating rabbits in different needlework techniques.


Easter vytynanka and silhouette carving for the Easter holiday


For those who crochet, a master class Hen-shaped Easter egg case.

We give a second life to the most ordinary things 🙂 here.

A nest with polymer clay Easter eggs - this craft will take more time, but it's worth it! The magnet will take its rightful place on the refrigerator, it turns out very pretty)

And the most original, most unpredictable souvenir that you can make for Easter is jelly soap in the form of an Easter egg. Not everyone will do this for sure, so your souvenir will definitely stand out from many others!

Crafts AFTER Easter (eggshell crafts)
Yes, yes, I was not mistaken in the title) It was after the Easter holiday, when eggshells accumulate in abundance in every house, you can also do creative work! very original (you can find photo and video master classes at the link).


This is how I got the Easter guide to the articles and master classes of the Cross. I really hope that you will find what you were looking for or what will inspire you to be creative. Happy Easter to you!
Spring is very fresh, bright and long-awaited time of the year by all of us. It is probably the most favorite time of the year for many, since everything is green around, it smells, blooms, sings and flies. Spring freshness, cheerful trills of birds that have flown in from distant warm lands, what could be better and sweeter. Spring brings us yet another wonderful, albeit sometimes a little sad holiday of Light Easter. It is not for nothing that this holiday is called bright, since on this day the resurrection of our Lord God Jesus Christ took place. It is on this day that we all hear “Christ is Risen” among the lips of everyone, to which we hear “Truly Risen” in response. People bake Easter cakes, paint eggs and exchange these Easter attributes with each other. And now it is generally very fashionable and prestigious to give each other small handmade souvenirs for Easter. For example, you can make soft bunnies in the shape of Easter eggs as souvenirs, only with ears. It will look very cool and there will be cool gifts for loved ones.
So, let's consider a master class on sewing such bunnies and for a master class we take:
- Cotton fabric 100% quality Polish and Korean production, we take purple, blue and turquoise with small white polka dots;
- Pattern;
- Holofiber filler;
- The threads are white and black;
- Needle;
- Satin salad ribbon with peas, 5 mm wide;
- White cotton lace in the shape of a flower;
- Black rhinestones for the eyes;
- Knitted flowers in mint, pink and beige colors;
- Half beads in different colors;
- Scissors, pencil;
- Lighter;
- Sewing machine.

We take a pattern. Each bunny with us consists of two eggs for the body and 4 blanks for the abalone. Cut out one blank and one eyelet with an egg.


Now we take a cloth and apply our patterns to each.


We outline with a simple pencil.


It turns out from each fabric we need to cut 4 ears and two bodies. We cut out and now we need to iron all the elements from the fabric well.


Now in pairs, with the front side we fold the blanks of the ears and blanks of the calf. We sew all the blanks together with a machine, under-sewing by 2 cm so that all the parts can be turned out, filled with filler and then sewn up by hand.


First, we sew the sidewalls on the bodies, and then in a circle the workpiece itself. We make the side inserts so that later our bunnies take the shape of eggs.


Now we fill our fabric blanks with filler and sew them from the bottom by hand with a cap seam.


Sew the ears with a secret seam to the very calf at the very top. Tie ribbons around the ears and tie bows. We sew noses and mouths with black threads.
Children are our everything.
Family values and traditions are brought up in our children from the very birth. Very important for children's perception of a particular family holiday, for example, is played by direct participation in its preparation, and not outside observation. After all, preparing for an important event and creating a festive atmosphere is also a pleasant tradition. DIY kids crafts about and just like that develop the imagination and creative thinking of the child, allow you to feel what a thing created by your own hands means.
And joint family creativity is another good tradition! When a child, together with mom or dad, makes their own handicrafts to kindergarten, for example, or as a gift to their grandmother, or just to decorate the house, or just for the mood! In addition, this is a great opportunity for a child to learn something new and interesting, and just have fun and enjoyable time with his most beloved people!
.gif) Kids DIY ideas you can do at home with your child:
children's crafts made from natural materials,children's crafts from scrap materials,ideas for children's crafts for the holiday and as a gift,ideas for children's crafts for home decoration, crafts, soft toys and appliques, crafts and decor for children's clothes and accessories with their own hands, DIY ideas for children's leisure, parties and holidays.
Kids DIY ideas you can do at home with your child:
children's crafts made from natural materials,children's crafts from scrap materials,ideas for children's crafts for the holiday and as a gift,ideas for children's crafts for home decoration, crafts, soft toys and appliques, crafts and decor for children's clothes and accessories with their own hands, DIY ideas for children's leisure, parties and holidays.
I hope you like the ideas of children's crafts for the home, kindergarten, craft ideas as a gift to mom or dad, as a gift to friends and just for a good mood! Let them inspire you to create family creativity together with your children! There is no more happiness than giving a child the joy of communication and inspiration. Get inspired and be happy together!
 Soft toy Easter egg master class, handmade soft toy Easter egg.
These cozy DIY Easter crafts for children can be made to decorate a festive table or as a gift to your grandmother. Soft toys in the form of an Easter egg will be useful for the baby after the holiday - for playing or decorating the children's room. Making these Easter eggs is a snap! We need white or colored fabric, braid, pins, a needle and thread, scissors. Each egg is made up of four identical petal-shaped pieces. Each petal is sewn together in turn. Leave a little space at the bottom so that you can then fill the egg with padding or cotton wool. You can use old bedding or unnecessary things - preferably from cotton fabrics. If the material is white, the egg is decorated with multi-colored braid, and soft eggs made of colored fabric - as you wish. After all the sides are stitched (on a typewriter or by hand), we turn out our craft, stuff it and sew up the hole for stuffing. Soft Easter eggs are a wonderful occasion for children's creativity on the eve of a bright holiday. Make such a wonderful gift with your children to decorate your home or as a gift to your loved ones!
Soft toy Easter egg master class, handmade soft toy Easter egg.
These cozy DIY Easter crafts for children can be made to decorate a festive table or as a gift to your grandmother. Soft toys in the form of an Easter egg will be useful for the baby after the holiday - for playing or decorating the children's room. Making these Easter eggs is a snap! We need white or colored fabric, braid, pins, a needle and thread, scissors. Each egg is made up of four identical petal-shaped pieces. Each petal is sewn together in turn. Leave a little space at the bottom so that you can then fill the egg with padding or cotton wool. You can use old bedding or unnecessary things - preferably from cotton fabrics. If the material is white, the egg is decorated with multi-colored braid, and soft eggs made of colored fabric - as you wish. After all the sides are stitched (on a typewriter or by hand), we turn out our craft, stuff it and sew up the hole for stuffing. Soft Easter eggs are a wonderful occasion for children's creativity on the eve of a bright holiday. Make such a wonderful gift with your children to decorate your home or as a gift to your loved ones!
DIY Easter children's crafts for children, for home, for kindergarten and as a gift - ideas and master classes:
-
Easter crafts for children
- Children's craft Easter egg from kinder Master Class
-
Decorating Easter eggs with dry flowers Master Class
- Crafts from eggs and shells, Easter crafts
- Easter bunny soft toy master class
- DIY felt garland master class
Soft toy Easter egg master class with step by step photos:


Surprise egg. Such toy for Easter even an adult, not just a child, will be delighted. Especially if you put your favorite sweets there.))
The author of the master class - Natalie Gray - recommends, after "extracting" a surprise, fill easter toy padding polyester or padding polyester and thereby turn it into a full-fledged suspension. Or you can use a plastic egg. But first you need to sew.
What do we need to make such DIY Easter crafts?
Faux fur in the desired color;
Needle, thread;
Scissors;
Satin ribbon (narrow);
Mouline thread for face decoration.
Egg toy with a surprise for Easter master class:

Patterns by color: bunny - blue, chicken - green, cat - red. The paws of the hare and the cat are the same.
2. Cutting is the next step. When cutting, remember about allowances (they are not taken into account in the pattern). On fur parts, allowances must be made by the size of the seam. We make a cutout for the face with almost no allowance.
Try to cut the fur pieces carefully without damaging the pile. We cut everything that is made of felt, excluding allowances, with the exception of the muzzle and ears (they will go into the seam).
On the pattern, arrows indicate the share thread and the direction of the pile.

3. Let's start sewing the details. We use a buttonhole seam. The details of the legs and ears are double, they are trimmed along the contour with a buttonhole seam.
 4. Everything that is made of fur is best sewn with a double thread. We also use a buttonhole seam, but it is made a little differently and from this it will be more durable (look at the photo).
5. Sew the ears into the seam and overcast the "hole" on the back.

6. To toy an egg for Easter did not look like a bearded gnome, under the muzzle you will have to cut the fur a little. Direct the scissors in the same direction as the pile. It is better to try on an unnecessary piece of fur first.
The tail of the toy, or rather its tip, also sew with buttonhole stitches, then twist and sew from the front side to the right side, tightening a little (this way the tail will turn out to be curved).
7. With the aid of a disappearing felt-tip pen, draw the eyes, nose and mouth, and then embroider in two threads the floss.


We embroider a smile in one thread using a stalk-like seam.

8. Attach the paws and sew.

9. Now insert the tying ribbon. And sew the lace to the top of your head.
 Everything, DIY Easter egg toy ready!
Here are some more articles on Easter:


I bring to your attention a master class on making a fabulous plush Elephant. This master class is designed for those who already know how to sew and fasten parts of toys in the style of teddy bears. If you do not know this, then see my previous
The manufacturing time for the elephant is approximate.
The amount of materials required for sewing a toy may vary depending on the adjustment of the size of the printed pattern: the elephant can be made smaller or larger.
The height of the elephant sewn according to the proposed pattern is 30.5 cm and sitting 24 cm. Weight 910 g.
The head is slightly raised, as if he is looking into the sky.
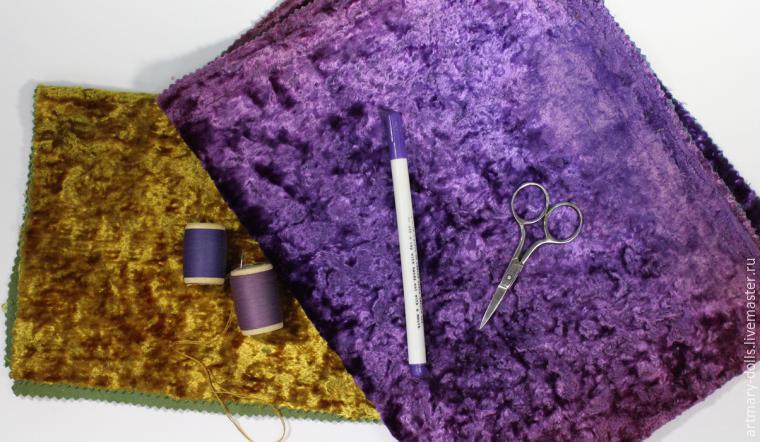
Materials:
1. Pattern.
2. Plush from purple to lilac and pink a little less than 50X60 cm (if necessary, the pattern can be reduced to fit on a standard piece of plush or mohair 50X35 cm).
3. Plush or companion fabric for cutting out the inside of the ears and feet.
4. Threads for sewing parts in the color of the plush base.
5. Swivel discs with a diameter of 45 mm in the head, 30 mm in the hands and 35 mm in the legs, if you sew according to the proposed pattern.
6. Set of fasteners: cotter pin
7. Metal or glass granulate.
8. Glass eyes on a hinge. In this case, I used blue eyes with a diameter of 9 mm, but you can take eyes with a larger diameter, it will be expressive. Transparent eyes painted with acrylic paint on the back will look good.
9. Super strong threads for sewing on eyes, for sewing open areas after filling.
10. Sawdust for stuffing. You can use a different filler.
Additionally at will:
11. Transfer paper (for thermal transfer of images) Lomond for inkjet printing.
12. Metallized thread.
13. Beads and beads (see ear trim).
Instruments:
1. Fabric marker.
2. Scissors.
3. Sewing needle.
4. Bead needle.
5. Long needle for attaching the eyelet.
6. Iron for transferring thermal stickers.
7. Sticks for stuffing.
8. Cotter driver.
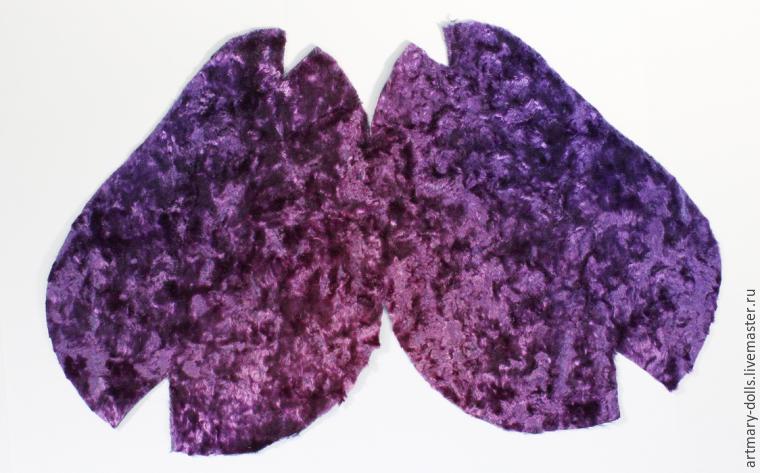
Plush of absolutely amazing color, delicately faded. I want to play out this detail as much as possible when cutting out a toy:
Stitching the head
First you need to sew the facial parts of the head with the occipital.

Next, you need to do the head stuffing. I use for stuffing, in this case lime sawdust. I stuff the trunk with padding polyester. It is not packed as tightly as the head. The head mount must be inserted so that the cotter pin protrudes exactly at the convergence point of all seams:

Tightening the place for the eyes
1. Outline the points of attachment of the eyes. You need to maintain symmetry.
2. Draw a strong thread folded in half from one target point to another.
3. We return the thread back, but to a place near its entrance.
4. Thus, on one side, a loop is obtained, and on the other, two ends of the thread are brought out.
5. Firmly press the tightening points.
6. Tighten the thread (tie both ends) by tying it in a knot.

Fixing eyes (simplified version)
1. With an awl, gently pushing the fabric apart, we make holes for the eye loop. Do not make too large holes, since we will squeeze the loop later (see point 6).
2. We tint the place where the eye is attached.
3.Fold a strong thread in half and thread it through the eye loop.
4. The ends of the threads (there are 4 of them) are inserted into a large needle.
5. We insert the needle into the hole for the eyelet, which we made with an awl and bring it out into the seam on the head.
6. Gently squeeze the tab to flatten it. Don't overdo it, this place is very fragile.
7. We draw the thread into the seam, pull it so that the eye falls into the recess and sits firmly there, and we tie the ends of the thread into a knot.
8. We do the same with the other eye. We press the eyes slightly, but tightly.
9. The ends of the threads must be cut and the knots must be sunk into the fabric. Since this is a seam, it is not difficult to drown the knots neatly. If the stuffing is done tightly (and the head must be stuffed to the state of "wood"), then the thread tension will not weaken.
Beautiful ears
The ears of the elephant are big, I want to decorate them. You can use ribbons, you can use beads ... I chose thermal stickers and subsequent finishing with beads, gold threads and beads. Prepared in advance images of butterflies for the format of this paper. To complete this step, you will need Lomond A4 Inkjet A4 140g / m2 Transfer Paper for dark fabrics, like this:
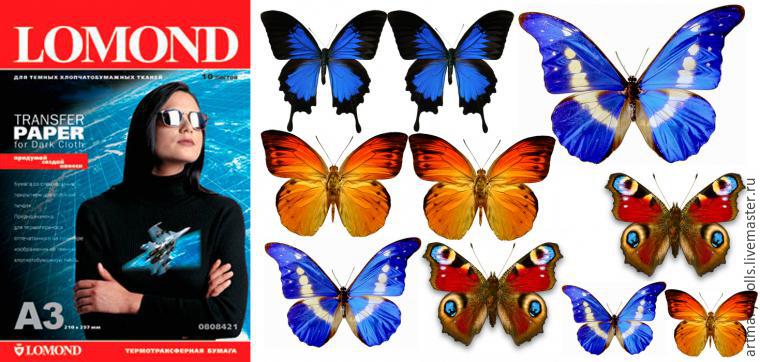
I picked up different butterflies so that there was a choice.
If you use this paper in your work, then on its packaging there are instructions in Russian, which must be strictly followed. I will not duplicate them here, I will only note that the process differs from the transfer of a picture to a light fabric. When translated, the picture sealed the plush very well, it turned out to be an even pattern. I chose different butterflies that "sat" on the ears of the elephant.
This is the outside of the ears:

Now we need to add a twist: Iron-on stickers alone don't look good. To do this, I make a backstitch with Madeira metallic gold thread along the veins of the wings and add a lot of beads and beads:

The photo, unfortunately, does not convey how beautifully the beads, gold thread and beads shimmer.

It is not necessary to make the ears of the elephant the way I did them. You can embroider patterns or flowers on them with satin stitch, cross stitches or ribbons. You can apply thermal embroidery or leave without decorations. I offer only one of the options.
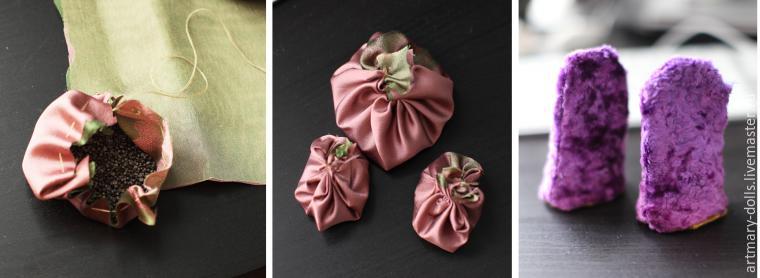
And now you need to sew the details of the ears, folding them with the front side inward, and also sew all the other details (torso and legs). Here's what happened:

The ears can now be sewn on. To do this, we first pin them with pins to make sure that they are placed symmetrically. Sew on with a blind seam. I pass the seam twice over each ear.

Padding
Before stuffing the legs and torso, I suggest making special bags with granulate to make the bottom of the toy heavier. The granulate is needed so that the toy is stable, weighty (it is more pleasant to hold it in your hands than to hold it in your hands than a store one filled only with syndepon, since it feels like you are holding a living creature).
So, we make bags with granulate for the legs and a bag with granulate for the body (this bag is placed in the "bottom" part of the toy).
To do this, we need a scale for measuring an equal amount of granulate in the paw bags, a small piece of thin but dense fabric and, in fact, the granulate itself.
How do I determine the desired weight of the granulate: I weigh my head on a kitchen scale and add a little to the result to gain the upper hand. The head with decoration and ears weighs exactly 310 grams. That is, for the body and legs, I need about 300-350 grams of granulate.
For legs: We measure out 60 grams of granulate and put it in a bag, previously tightened along the edges with a thread. We tighten the bag, sew the top - this will be a bag for one leg. We do the same for the other. The granulate inside the bag should not be tamped tightly, but should be placed freely.

For the body, I measured out 200 grams of granulate. A little more can be.
We place small bags in the legs, in the feet, so that the granulate inside the bag evenly distributed over the foot. You can get confused and sew a bag with the diameter of the lower part equal to the foot. You can first fill the foot a little and only then put a bag on the filling.
Thank you for attention!
We also recommend
 Happy birthday pictures for women
 Happy birthday daughter pictures - congratulations Download a beautiful card happy birthday daughter
 Happy birthday to the fisherman Happy birthday to the fisherman
 Beautiful animated cards Happy Birthday (GIF)
 Good morning - funny pictures download
 How to decorate a New Year's table Decorate a table for the New Year