Tulle topiary. Topiary: an original gift for any event
I was asked to make some bright tree for a 10-year-old girl. The preference was given to the fact that the tree must have the corresponding figure. A tree ripened in my head and I began to complete the task.
For work we need:
Raffia yellow
- red color
-foam 2 cm wide
- a tin can from canned corn and peas
-building plaster
-glue gun
- glue sticks
-wire
- satin ribbon of red color 0.5 cm wide
-sisal yellow
-decorative ladybugs
-decorative sequins
-acrylic paint of red color
-brush for paint
-stationery knife
-scissors
-pliers
- sheet of A4 white paper
-simple pencil

Cut off two wires of 30 cm each with pliers. We dilute the building gypsum with water to the state of a liquid slurry, immediately pour it into a tin can, insert two wires into the middle and hold them until the gypsum dries.

On paper we print the number 10. If it is not possible to print, then simply lean a white sheet of paper against the monitor and carefully redraw the numbers. I did so. Cut out the numbers with scissors and redraw them onto foam. We cut out the numbers from the foam with a clerical knife.
Then we cover the numbers with acrylic paint and let them dry a little.

Take one strip of red raffia and one strip of yellow. We connect them together and glue them with hot glue to zero.

Wrap the raffia tightly around the zero.

As soon as the raffia is finished, fix its ends with hot glue.

We again take two multi-colored stripes of raffia and wrap the figure, fixing the ends with hot glue.

Now let's get down to one. I needed five stripes of raffia for it to be equal to the width of the number. Glue with hot glue, alternating colors.

Hot glue to the bottom.

And we can say so, we return to the starting position, cut off the excess with scissors.

Again we take one red raffia strip and one yellow one. We glue the ends to the bottom of the one.

And we begin to wrap tightly.

When the raffia stripes are over, glue the next ones and wrap them just as tightly until we wrap the entire number.

These are our numbers.

We will need to roll the wire into a spiral. She then looks very nice. We take either a rolling pin or a can of some spray paint. I had a spray of glue. We wrap a spiral around it.


We take out the jar and pull the wire up a little by the end. We do the same with the second wire.
We also pull out the second wire. That's what I did.

Glue the numbers to the wire with hot glue.

I also decided to decorate the tin can with raffia. I glued red raffia to the bottom.

We wrap the middle with yellow raffia, and the upper part again with red raffia.

We wrap the wires with a red satin ribbon, fix the ends with hot glue.

We decorate the plaster of paris with yellow raffia. We glue it with hot glue, only gently, otherwise, pressing the sisal to the plaster, you can burn your fingers.

We trim the excess sisal with scissors.

Tie a bow from red raffia and glue it on the pot.

From yellow raffia, I tied six bows.
A beautiful wedding topiary will be a great decoration for a ceremony or a gift for newlyweds. You can find it in a flower shop or make it yourself. It won't take much time, but it will give many pleasant moments to those to whom it is intended. All the tools you need to work are easy to find at home. If something is not at hand, a handicraft store will always help.
The greatest number of difficulties arises at this stage. On the one hand, I want to create something non-trivial, but on the other hand, the wedding theme does not imply ornate forms. That is why there are often cases of extremes when the tree is too ascetic or, conversely, overloaded with decorative elements. Photos of ready-made options will help to preserve common sense. Watching them does not take much time, but it will direct the flight of imagination in the right direction.
It will not be superfluous to go shopping with goods for weddings. Chances are good that there on the shelves it will turn out to find several creative ideas.

In addition, attention is drawn to the following details:
- Age of citizens who decided to marry;
- National traditions;
- Features of the venue of the wedding ceremony;
- Aesthetic preference of the bride and groom.
We make a topiary for a wedding from cotton balls and organza
It is considered the most affordable option in terms of price. Organza, decorative stones and a little cotton balls are used as the main decorative element. The presented version gained popularity due to several qualities. Firstly, it is about simplicity and speed of manufacture. Even if there is very little time left before the wedding ceremony, you can create a composition with your own hands in 4-5 hours. You need to start with the selection of materials.
- Sewing pins;
- Cotton balls;
- Organza in the required colors;
- Candles;
- Straight stick-base made of any strong material;
- Flowerpot;
- PVA glue;
- Glue gun;
- Decorative pebbles;
- Pearl acrylic paint;
- Brushes.

The direct manufacturing process begins with fixing the floral sponge in a pot. On it, the barrel is fastened, on top of which a foam base ball is installed. The base of the barrel is fixed with polyurethane foam, which hardens for about 2 hours. After that, attention is drawn to the cotton balls, which are connected into a single canvas using PVA glue. It is advisable to immediately fix them on a floral sponge.
In most cases, the glue dries up in 2-3 hours, after which decorative stones must be carefully laid on top. It is advisable to make them completely cover the cotton wool layer. The flower petals are made of organza with scissors. A circle is used as the basic geometric shape. Its edges are carefully scorched with a candle flame, which will prevent the fabric from dispersing.
Having applied the first layer of temperature paint to the future trunk, it is necessary to pass a pin through the center of the petals. After that, the petals are fixed on a foam base. The finished tree is decorated based on the aesthetic preferences of the bride and groom.
Making a topiary for the bride and groom from satin ribbons and tulle
A master class attended in advance will give you a lot of interesting ideas. Here you can not only observe the work of the designer, but also ask questions of interest. In the past few years, the composition of tulle and satin ribbons has become widespread. Burlap, linen, satin and, again, organza are used as additional decorative material.
1.jpg)
In order for the bride and groom to be pleasantly surprised, it is recommended to use airy tulle for decoration. Air ribbons also look good.
From a practical point of view, when implementing a project, attention is paid to the following factors:
- Bows will help create visual accents. One of them is located in the middle of the trunk, and the second decorates the pot;
- Do not visually overload the trunk of the composition. It is better to limit yourself to a decorative ribbon;
- Tulle creates a pillow for setting satin roses, the color of which should be discordant with the composition.
We create a topiary for a wedding anniversary
As mentioned earlier, thematic photos will help determine the direction of the fantasy flight. Designers urge to remember the need to take into account the peculiarities of the couple, on whose wedding anniversary it is planned to present an artificial composition. Possessing such information, the creation of a future topiary will not take much time. The versatile option is made from coffee beans. He will not only decorate the wedding, but also emphasize the importance of the coming anniversary.

If originality is at the forefront, then the choice must be made in favor of CDs or DVDs, money, coffee beans, and so on. The latter option, according to the designers, is suitable for celebrating an anniversary.
For work, you will need the following materials:
- Tulle tape;
- Satin tape;
- Alabaster and plaster;
- 2-ply tape;
- Styrofoam ball;
- Smooth table for work;
- Small flowerpot;
- Smooth wooden stick;
- Grain coffee.
How to make a topiary with your own hands (video)
In the future, the manufacturing process is similar to that described above. The main thing is to maintain a balance between the functional and the creative part. Too large a tree will overload the space, and too small will get lost in it. That is why it is better to give preference to the medium-sized option. Do not limit yourself in terms of choosing colors and shapes. The more creativity there is in the project, the more positive emotions the heroes of the occasion will receive.
Creative wedding topiary (photo)


A birthday topiary can be made to anyone. What is the original birthday gift to present to mom, sister, girlfriend? Topiary, of course! A practical, unusual and such a bright gift will delight every day. You can think for a long time about what to give for your birthday. But a handmade gift will be much more expensive and more pleasant than something bought in a store.
Birthdays of mothers, girls, sisters cannot do without bouquets of flowers. However, fresh cut flowers live only about 2 weeks - and the holiday is gone. If the choice fell on fresh flowers in a pot, then such a gift is not for everyone, because different types of plants need their own proper care, which is very difficult to carry out in our hectic time. There is a way out - topiary!
What is such a gift
Topiary is a kind of craft that resembles a decorative tree, a flower in a pot. Such art has come from the time when trees were cut into various forms, they were made into labyrinths. I immediately remember the 17th and 18th centuries in Europe, when women walked through the sheared maze of trees in lush dresses, with voluminous white curls, wigs and an umbrella from the sun. Since then, they began to engage in this kind of crafts.
Now topiary can be seen at home as a decorative element, on the table in the office, giving a little warmth to the gray room, in the children's room. After all, topiary is very practical, they do not need to be watered, transplanted, sometimes it is enough just to shake off the dust or wipe with a cloth. So, let's begin!
How to make a topiary with your own hands (video)
Topiary for mom's birthday
How to make a topiary for mom? First you need to find out what color mom loves, probably pink, blue, lilac. All women love warm and vibrant colors. We decided on the color scheme. Now we proceed to the type of activity of the mother. If you need a thematic topiary, then you need to take into account all the little things. Let's say that some mothers work as an accountant, others as a hairdresser, that is, you need to know the specifics of work. Let mom love white, yellow and lilac colors, and work as a seamstress. This means that this must be taken into account in the topiary.
For such a thematic topiary, paper, wire, fabric, varnish, glue, threads and buttons will be required - this is the main thing, perhaps some materials and tools will need to be supplemented in the process.
Moreover, buttons, threads and paper are selected according to certain colors that mom loves.
As soon as we have typed all the tools and materials for the craft, we proceed to creativity:
- Pot. First, we make a pot for the future tree. They can serve as a large mug, a glass or just a purchased flower pot, that is, at personal discretion. We choose the most budgetary one - a glass from a drink left after the cinema, or from popcorn. Smear the front side with glue and wind the threads. If you stick first yellow, then white, and so on in turn, you get funny stripes. It is better to use woolen threads, as they are thicker and stick better.
- Trunk. They can serve as a wire, a tree branch. The more curved the trunk of the topiary is, the more spectacular it will look. The barrel can be coated with silver varnish or threads can be wound around it.
- Hat. This is the most important part of the topiary. You have to work hard with this element. Since at the beginning, decide on the profession of the mother (seamstress), the main components of the cap are buttons. The bouquet will consist of buttons put on wires, and it is necessary to make the splendor and completeness of the composition. We make petals from paper. And the final touch will be scissors cut from paper, coated with silver varnish and glued to the very top.
- We collect all the parts by placing the barrel in the pot. To keep it tight, you can glue plasticine to the bottom. Wrap threads on top and put buttons. And now, the gift is ready! It remains to give it to mom.

DIY topiary with a child
In the process of creating crafts, the child develops imagination, logic and hand motor skills, all the more so it is so exciting. Surely every child had a task to make a craft for kindergarten. And this task is not only for a girl or a boy, but also for their parents. After going through the herbarium, sewing, beading, paper crafts, everything that has already been tried by the child, you can combine all types of needlework in the topiary. One of the most interesting ideas is the children's topiary of growing up. For this, of course, you need to collect a photo of the child from birth to the present day. Then you will need a pot, paper, glue, wire, plasticine, cloth, threads, small toys.

So let's get started:
- Pot. Any already unnecessary children's container, for example a bottle, a cup, a glass, will serve as this item for a topiary. Or a broken part of the toy, for example, the body of a dump truck, its hinged part. The pot can be varnished or left unchanged for even more fun.
- The trunk can be a pencil, a branch of a tree, a wire. The barrel can be varnished, wrapped with multi-colored threads.
- The hat "topiary of growing up" will consist of photographs, small toys. All this can be hooked onto the wire. However, if you attach just a photo and toys, it is unlikely that a composition will work out; for this, you can make flowers for a girl or boats for a boy from multi-colored paper, and attach photos and toys to them. Photos should be small, and they can be glued so that the photo can be seen from the window of a paper boat or plane. Then we make the pot and the trunk in the same style. If the components in the bouquet are boats, then the pot will resemble the ocean. A flower arrangement is suitable for a girl. We make daisies out of paper, and in the middle of the flower we cut out the face of the child with glue. It should be very fun and unusual. It will be quite clear if you place a photo of a newborn on the top of a tree, and as he grows up, go down the tree, distributing the photo so that you can see how the child has changed and grew.
- When connecting all parts of the topiary, you need to take into account that everything must hold on tightly. Most likely, the child will want to show it to everyone, will run around with this bush at home or in kindergarten. Everything should not only be tightly connected, but also secure. There should be no sharp protruding parts so as not to scratch the child's handles. It will be very clear if you still manage to preserve such a "topiary of growing up" until his adulthood, by pasting an already grown-up photo and presenting it on his birthday. Such a gift will generate explosive admiration!
Money tree (video)
Topiary is not just a gift, but an element of decor
Do-it-yourself topiary does not have to be done for the holidays or for the child's occupation; collecting such crafts is a good hobby. In addition to the birthday, you can make New Year's topiary, collecting them from coniferous branches, Christmas tree decorations. It is possible thematic: by March 8, by May 1, by the Day of the Power Engineer, Railway Worker, that is, by any event and day. However, it is necessary to take into account what first impression the made topiary should make, that is, carry the symbolism of the holiday. For example, in the office, in the office on the desktop on the eve of the New Year, you can place a New Year's topiary, which will give the mood of the holiday. At home, if you wanted something unusual, you can build a giant New Year's, which will be instead of a Christmas tree.

You can decorate the entrance: place topiary on the windowsills, which, unlike fresh flowers, do not need to be looked after.
It is very budgetary to make topiary, since such a tree can be assembled from scrap materials. A mug that is unusable in the household will fit under the pot, if its handle or some other part has broken off. The trunk can be a brush stick, a tube. Flower buds can be made from wallpaper scraps, which, for sure, everyone will have after repair. And varnish, which needs to cover the various components of the topiary, you can take any for nails. So it will be easy to collect all unnecessary in the house and make topiary!
Summer, it's time for weddings. We also paid attention to the production of wedding details on our website. Let's start the preparation by creating a gift - wedding topiary with our own hands, which will serve as a decoration for the festive table of the young or as a wonderful memento for the newlyweds.
To "grow" a wedding tree, you will need the following materials and tools:
self-solidifying or baked polymer clay, white for decorating doves; acrylic paints; decoupage napkin with a wedding theme; sponge and brushes for decoupage; clay or plastic pot; Styrofoam ball or heart; hard tulle (about 2 meters) or organza of your favorite color; fabric for decorating flowers, leaves and other decorative items; beads, half beads, beads in the form of leaves and flowers; Swarovski stones or Czech glass or crystal beads; satin ribbons; circuit;
PVA glue; glue "Moment"; glue gun; varnish; gypsum, plaster casting for a wish and a "brand" sign or polyurethane foam; ruler; scissors; a wooden stick or wire for decorating a tree trunk; white (green, light brown) floral tape; pendant in the shape of doves in love, silver; foam and small stones; sewing pins with beads at the end (from 50 to 100 pieces); sisal.

Work should begin with the preparation of the main material - tulle trims. We cut the fabric into squares of the desired size (from 5x5 cm to 10x 10 cm). You will need a lot of squares. The diameter of the crown of the tree and its splendor depend on their number.
For the convenience of creating squares, I made a square with sides of 10 cm from thin foam (cardboard is suitable as a material for making a pattern).

Then, from each prepared square of tulle, we create trimming using sewing pins (an alternative to pins is shortened toothpicks). To do this, fold the square in half, and then again in half.
There are many options for assembling the end faces. The difference is in folding and stringing the fabric onto the base.

We attach the finished trims to the foam base using a heated glue gun. It is better to glue the trims in a circle. This is just a small part of the prepared parts. Gradually glue the entire surface of the ball.

The next stage is the preparation of the flowerpot. Prime the surface of a cleaned and defatted earthenware or plastic pot and paint the desired color if necessary.

Then cut out the image you like from a decoupage card or napkin (printout) and use the decoupage method to arrange the picture on the prepared item.

Cover the flowerpot with varnish. Decorate with ribbons, lace and more as you like.

Now you need to prepare the trunk of the tree.

For a convenient location of the doves, an additional branch was required.

It is created by attaching a small branch to the main stick. Make a hole in the stick and insert the sharpened branch into it.

Decorate the entire trunk with floral adhesive tape. Attach the trunk to the crown of the tree with a glue gun.

Decorate the crown with additional decorative items and decorations: leaves, beads, flowers.

Create a beautiful bird nest using tulle threads. Decorate the nest with a glass leaf, egg beads, and a love dove pendant.

How to create flowers from clay and fabric, ribbons also see the master classes presented on the site.

Place stones, pieces of polystyrene on the bottom of the pot, or fill it with polyurethane foam.

Stick into the prepared flowerpot and fix the tree trunk with hot glue. Pour plaster on top.

Separately pour gypsum into the workpiece to design a "tag" with wishes or to indicate a trademark, for example, "handmade"

Decorate the plaster layer in the pot with sisal using Moment glue. Decorate with beads, or small figurines of the bride and groom, with flowers (as you wish).

Glue the already prepared nest with a couple of pigeons to the branch. At the bottom of the crown, attach a bow ribbon to match the entire composition. Draw the names or initials of the groom and nevsta on the bow.

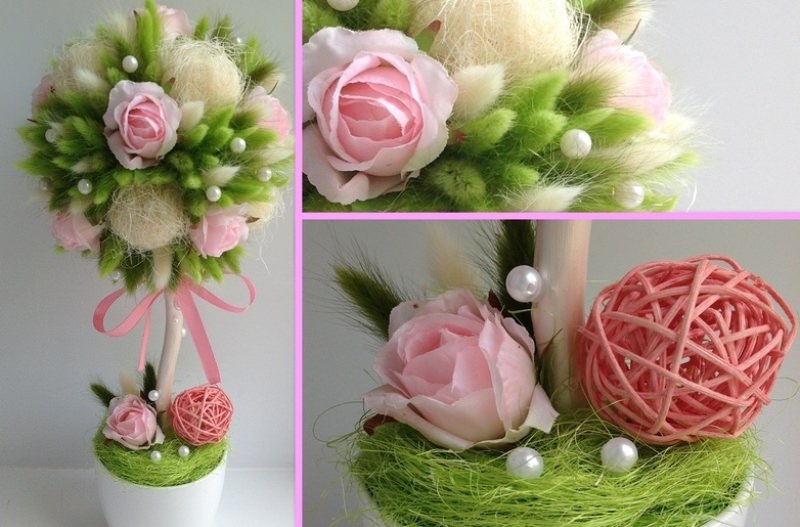
In the photo you can see the details and elements of our version of the wedding topiary.

Thanks to the do-it-yourself tulle topiary design, the tree turns out to be solemn, festive, elegant and airy.
It should be noted that the wedding tree is necessarily created only to match the tone and color of wedding decorations and the chosen color scheme of the wedding as a whole (rarely contrasting).

Topiary - a tree of happiness, a beautiful accessory or a symbolic gift? As anyone else, the main thing is that there are a lot of variations in the purpose of such a tree. You can make beautiful topiary with your own hands from fungi. But what it is, it is worth explaining in more detail.
Funtiki are small organza details that can be assembled into a single composition. In the photo you can see what they are. The name is funny, and it will not be difficult to make them.

Funtiki are made like this:
- Cut into small squares. It is undesirable for the side to be more than 7 cm. In an ordinary organza, the edges may sprinkle, but the floristic organza will not cause such trouble. Therefore, almost every master class advises taking it exactly.
- Fold the workpiece diagonally with your own hands, slightly shifting the corners.
- And then the fabric must be folded so that an accordion is gradually obtained. To do this, mentally divide the square into four parts.
- Such a pound is fixed with an ordinary pin.
- You can fasten two blanks with a stapler or just a thread.

These are the funicles that can decorate the topiary with trimming. You will have to make a lot of them if you want a lush tree. A video or photo master class, it happens, explains how quickly you can make a lot of such funky blanks at once.
How to make organza curl (video master class)
Organza topiary: materials and tools for MK
Using the example of one beautiful tree, you can show a universal master class for organza topiary.
So, from the materials you will need:
- Organza itself - 2.5 meters (fabric width - 70 cm);
- Foam ball-blank, diameter of which is 7 cm;
- Hot glue and glue gun;
- Little vase;
- Stapler;
- Polyurethane foam;
- Scissors;
- Decorative driftwood, wire or karanash;
- Satin ribbon;
- Decorative details (e.g. sisal, lagurus, corrugated board, etc.).

Some decorative details can be made with your own hands, and as others you can take ready-made ones - the same butterflies, ladybugs, artificial flowers, wedding brooches, etc.
Topiary "Heart" from organza (video master class)
Organza topiary master class
In this case, the master class begins with the manufacture of the barrel. Why is it better to take snag? Because the shape of the trunk does not need to be done with your own hands, you will have a ready-made natural component that needs a little decor.
How to decorate a snag with your own hands - mini MK:
- The driftwood is wrapped with a satin ribbon, the end of it is fixed with hot glue;
- You can wrap a snag and take a white twine;
- Openwork braid can also become a decoration for a topiary trunk with organza curls.
Look at examples of work in the photo and video, which trunk decor will seem more convincing to you, repeat that.

- You need to insert a snag into the foam ball, tightly and evenly, fix it on hot glue;
- Now start the decor of the flowerpot, insert it with a snag and fill it with polyurethane foam, just not to the edges of the lawn (foam usually increases in size);
- The little flowerpot can stand the night, and in the morning you will see that the foam has grown, and you cut off the excess evenly;
- Then the master class gradually turns to work with fabric, the organza needs to be cut into small squares;
- From each square you need to get a pound already familiar to you, put the blanks in one place;
- Each pound is glued in turn to the hot glue on the foam ball.
You will get a crown of small flowers. The organza topiary is already at the finish of its production - but there is still an important stage, at which you will have to decorate the tree with your own hands.

Again, how to do this, look at the examples of photos, a video master class will also help. But there are also tips specifically for this topiary with organza curls.
Topiary with organza ballerina (master class)
How to make organza topiary: tree decor
Organza topiary can be decorated with the same delicate elements, airy in their structure. This, for example, sisal, tulle. Or you can balance the craft with a heavier decor: for example, it can be flowers made of polymer clay, or a scattering of flowers from their cold porcelain.
Ideas for decorating topiary with organza curls:
- With your own hands, make a string of pearls on the trunk of a tree or flowerpot. To do this, take mother-of-pearl beads and make a snake out of them, glued to hot glue.
- The top layer of polyurethane foam can be covered with sisal. Almost every MK offers just such a solution, although you can, of course, make a scattering of colored salt around the trunk in a flowerpot, and lay out a heart out of beads, etc.
- The topiary pot itself with organza curls can be tied with a satin ribbon in the color of the crown. You can tie a flowerpot with a lace ribbon.
- Also, organza topiary can become a tree of photo-confessions. Make a do-it-yourself sun napkin from ten photos, on which there will be a topiary pot with organza curls.
- With your own hands, you can stick rhinestones on the crown, which will beautifully shimmer in the sun.

A standard master class suggests using not polyurethane foam, but gypsum or alabaster. The question of choosing what is more convenient for you to work with, then take it. Also, organza topiary can be used as an object for a photo, for example, if you are doing a winter photo session. A snow-white do-it-yourself topiary will be very relevant.
Topiary made of wide organza ribbons (video master class)
It is impossible to single out one master class covering several technologies for making a tree of happiness at once. Take creativity from each, and create your own lucky topiary that will bring you good luck.
Organza topiary (photo)


We also recommend
 Happy birthday pictures for women
 Happy birthday daughter pictures - congratulations Download a beautiful card happy birthday daughter
 Happy birthday to the fisherman Happy birthday to the fisherman
 Beautiful animated cards Happy Birthday (GIF)
 Good morning - funny pictures download
 How to decorate a New Year's table Decorate a table for the New Year