Origami ladybug. Modular origami ladybug Paper origami ladybug diagram
Oksana Bulakh
Construction lesson (origami) " ladybug» ( preparatory group)
Acquaintance with the surrounding world. Natural surroundings.
Construction: origami« ladybug» . (Preparatory group) .
Goals:
Enrichment of the vocabulary on the topic "Insects"
Development cognitive abilities children
Formation of ideas about moral and ethical norms of behavior
Raising an ecological culture
Software content:
Learning tasks:
Generalize children's ideas about the diversity of insects;
To consolidate knowledge about the conditions of their nutrition;
Exercise in distinguishing and naming common representatives groups insects for striking features (size, color, originality of individual parts of the body);
Clarify ideas about the benefits of insects;
Develop ingenuity, form imaginative thinking;
Continue introducing technology origami, develop and independently realize a creative task.
Speech tasks:
Exercise in word formation, the use of nouns with diminutive suffixes;
Learn to coordinate numbers with nouns, correlate the number and number (number).
Developmental tasks:
Development of mental processes;
Developing an emotionally positive attitude for work.
Educational tasks:
To bring up in children the desire to take care of nature, to behave correctly in the forest, in the field; not to destroy the living conditions of forest dwellers.
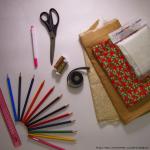
Materials and equipment:
Insect presentation, insect photography, toy insects, colored paper red and 2 cardboard templates, black felt-tip pen, 2 small squares white(for peephole, pencil, glue, scissors, sample toy origami« ladybug» .
Course of the lesson
Introductory word of the educator:
- Guess the riddle:
She is nicer than all the beetles
Scarlet back on her
And there are circles on it
Black dots (ladybug)
We will get acquainted with the amazing and diverse world of insects. Imagine that we are together with ladybug ended up in a green meadow.
Presentation "Insects".
Guess which insect is hiding in the mystery?
On a fragrant flower
The flying flower has sat down.
Moved by the flower
All 4 petals.
I wanted to rip it off, -
He fluttered and flew away!
What is this insect? (butterfly)
Consider a picture of a butterfly. How many wings does it have? How many legs does she have? Count it up. (children think they answer)
Let's do the exercise and you will find out who crawled to visit the butterfly.
Chime rushes along the path
Swift centipede
Knocks loudly with her feet
She is in a hurry on business
Caught on a tree stump
And lifted forty legs.
Hee hee hee yeah ha ha ha
This is such nonsense.
What is this insect? (centipede)
- Guess another insect:
She has 4 wings
The body is as thin as an arrow
And big - big eyes.
We call it (dragonfly).
Consider a picture of a dragonfly. Does it have wings? How many? How many legs? Count it up.
Now children, I feel like a little conjure: "One, two - here I am the fairy now".
I will turn you magic wand in insects.
You - insects should fly, jump, crawl, emit characteristic sounds - a mosquito (zzz, bee (zzg, fly (zzz, bumblebee (f-f-f). – "One, two, three, four, five - here you are again children.".
The journey continues, from a flower meadow we moved on to a spacious grassy lawn. A large pine tree grew on the lawn, and under the pine it boiled Work:
Without work, for the life of me
Can't live (ant).
Consider a picture of an ant. Does it have wings? (No)... Why do they run fast, what do they have? (six legs)... Suddenly, under our feet, someone unexpectedly jumped up:
A violinist lives in the meadow
He wears a tailcoat and walks at a gallop.
Guess who is this violinist? (Grasshopper)
Consider a drawing of a grasshopper. Let's play with the grasshoppers in the meadow. Repeat after me with movements.
Raise your hangers
Jump grasshoppers,
Jump - jump, jump - jump,
We sat down to eat grass,
Let's listen to the silence.
Hush, hush, high
Jump on your toes easily.
And so guys, we learned that all butterflies, ants, bees, grasshoppers, flies, mosquitoes, centipedes are all insects, huge world insects. They all adorn our land. And we must know that if insects disappear, plants disappear, animals die and birds: some cannot exist without others. Insects are part of nature, and nature must be protected, loved and protected.
Now I propose to sit down at the tables and do ladybug made of colored paper(origami) .
Physical education:
Everyone got up from the chairs, hands on the belt, legs slightly apart.
It's very hard to stand like this
Do not lower the leg down,
And do not fall, do not swing,
Don't hold on to your neighbor.
They all sat down quietly.
Consider a toy - a pattern. We need a red square, an oval stencil, the base of our ladybug, with paws.
Stages of work:
1. Fold a square sheet in half, unfold, fold in half again.
2. Unfold, fold the square diagonally, unfold and fold to the other side diagonally.
3. Expand, grasping one of the diagonals with both hands, spring and bend the sides of the square inward, iron the fold lines, we have a basic model origami- double triangle.
4. Take a black oval-shaped template, put it on the triangle, the narrow top of the oval, should overlap with the top of the triangle, circle with a pencil.
5. Cut out the head and back of the body with scissors without cutting the fold line.
6. On the basis ladybug glue the abdomen with the paws.
7. Draw the head of the bug with a black felt-tip pen, it should reach the front legs, draw black dots on the back ladybug.
8. Cut out the eyes from the white squares and glue them on the head.
9. On a green meadow, plant your bugs, look how beautiful and funny they are.
ladybug, scarlet back,
Clung deftly a ladybug by a blade of grass.
Up at a leisurely pace, crawling along the stalk,
To a honey-scented bright flower.
Eats fast ladybug harmful aphids,
And a fragrant flower, she will thank her.
Which bug do you like the most, why?
You guys all worked together and worked well, pleased me with your bugs.
Used Books:
- "Complex classes in preschool educational institution» preparatory group, M.A. Vasil'eva.
- "Scenarios occupations on environmental education preschoolers " preparatory group, L. G. Gorkova, A. V. Kochergina, L. A. Obukhova.
Internet media.
Related publications:
Application "Ladybug" Objectives: We repeat the characteristic features of a ladybug; arouse interest in nature; we fix the methods of work.
 From black paper and using a hole punch, we make blanks of black dots for a ladybug. Cut an oval out of black paper.
Purpose: to develop artistic and creative abilities; to maintain interest in visual activity... material: -sheets floor A4; -gouache.
Abstract of a drawing lesson "Ladybug" (middle group) Summary of the lesson on visual activity (Drawing) middle group"Ladybug". Developed and carried out by: Rudinskaya Irina Viktorovna ,.
- Fold a red square sheet in half lengthwise and crosswise. Unbend.
- Flip the square over and fold it diagonally. Expand.
- Fold a triangle out of a square, bending the sides of the square inward. This is the basic origami model - a triangle.
- Cut a beetle pattern with legs out of black cardboard.
- Place the base of the beetle over the red triangle and trace with a pencil. Cut out the model.
- Glue the red body to the black base with legs.
- Paint the head with black markers (up to the first pair of legs), draw dots on the back.
- Glue the eyes and insert the wire into the holes in the cardboard (pierce with an awl), previously bent in the shape of the antennae.
Finished craft
You don't have to limit yourself to just the ladybug. Make, for example, another Colorado potato beetle out of yellow and black paper (black stripes along the body), or yellow beetles speckled.
Book
Make figures out of paper, according to the patterns in the book, maybe even Small child... This is not quite a classic origami, for these crafts you still need to use glue and scissors.
| "Origami. Funny crafts " Armin Teubner Plan - synopsis of the master - class Theme: Origami "Ladybug". Teacher: __________________________________________ The date of the: ______________ year. Location: MBU DO "Center children's creativity Novoorsk district " Duration of the master class: 30 minutes Summary of the lesson on the "Samodelkin" program ____________________________________________________ The purpose of the master class: development artistic creation in children by mastering the origami method of construction. Educational tasks: 1. to form the ability to follow oral instructions; 2. teach various techniques for working with paper; 3. repeat basic geometric shapes. Developmental tasks: 1. to develop children's artistic taste, creativity and imagination; 2. to develop an eye in children, to accustom them to precise finger movements; 3. develop spatial imagination. Educational tasks: 1. to develop an interest in paper design; 2. to form a culture of work and improve labor skills; 3. to teach accuracy, the ability to use material carefully and economically, to keep the workplace in order. To cultivate love and respect for oneself to a loved one- mom. To foster a desire to do something good for mom, to prepare a gift for her for the holiday. Materials and equipment:presentation, a sample of the craft "Ladybug", squares (side 14.5 cm) made of double-sided red paper, - circles (with a diameter of 0.5 - 0.7 mm) made of black paper, scissors, glue - pencil, napkins, oilcloth. Master class progress Educator: Listen to the riddle and guess it. Loose snow Children: Spring What time of year can these pictures be attributed? Children. Moms, grandmothers and girls. Teacher: Spring has come again She brought a holiday again, The holiday is joyful, light and tender A holiday for all our dear women. I suggest you make a gift to your mothers in honor of this holiday. To find out what kind of gift you want to make, you needto guess the riddle: She is nicer than all the bugs, Her back is red, And there are circles on it, Black dots. Children: Ladybug. Teacher: Right. Today we are going to make a postcard on which origami "Ladybug" will be glued. A method of making origami "Ladybug" - For work we need scissors, glue, red paper, a blank made of black cardboard, small black paper circles. - To get it beautiful craft, I want to remind you of the origami rules: all actions must be performed on the table and the folds must be ironed well. 1. Take a square sheet of red color, fold it in half so that the corners and sides exactly coincide. Expanding. 2. Turn the sheet with the other side facing us, fold it in half. Expanding. 3.Fold a triangle out of the square, bending the sides of the square inward. 4. Put the base of the beetle on the red triangle and outline it with a pencil. Cut out. Now, guys, let's turn ourselves into ladybugs. Physical education. They circled around themselves and turned into ladybirds. Ladybugs, show your heads, noses and mouths, Arms, legs and tummies. Ladybugs, turn the heads to the right. Ladybugs, turn heads to the left. Tap your feet, slap your wings. We circled around us And turned into boys and girls. They turned to each other and smiled amicably. Teacher: There is very little left and our gift will be ready. We glue the black head with a mustache to the red base. - Now, guys, look at your ladybirds. Is everything on them or is there something missing? We look at the picture. There are not enough black dots. That's right, let's glue these dots in the form of small black circles on the back of the ladybug. Now, guys, we'll put our ladybugs on a green piece of paper glued to a postcard. Bottom line: Our gift for mom is ready. Let your ladybug bring mothers joy and warmth. Origami ladybug is one of the most popular paper origami. If you do not know how to make an origami ladybug, then on this page you will find everything you need to assemble this simple paper figurine.
Assembly diagramBelow is a diagram of the assembly of an origami ladybug from the famous Japanese master origami Fumiaki Shingu. If you follow the instructions carefully, assembling the origami ladybug will not take much time, and the result will be the same as in the picture. After doing the described in the diagram several times, you will understand how to make an origami ladybug quickly and without peeping into the diagram.
Video master classCollecting origami ladybugs for beginners can seem like a daunting task. Therefore, we advise you to enter the query "origami ladybug video" on YouTube, the largest video hosting service on the Internet. There you will find many different videos about the origami ladybug, in which the steps for assembling the ladybug are clearly shown. We hope that after watching the video of the assembly master class, you will not have any more questions on how to make an origami ladybug. And here is also a simple video tutorial on how to assemble an origami ladybug: If you are interested in modular origami, here is a video example of modular origami ladybug: SymbolismThe ladybug is the oldest symbol with a positive coloration. In many traditions, it acts as a symbol of love, luck and good news. Also, the ladybug personifies kindness and forgiveness and is perceived as a good sign. This bright paper bug, so reminiscent of a ladybug, is the famous and beloved by children insect. He can crawl on your table, on the windowsill, on a flower pot, if you make it using the origami technique. Introducing detailed diagram assembly, which will help everyone to make this wonderful craft. Especially such a prospect will be delighted by children who are very fond of ladybugs, always catch the first spring bugs and bring them into the house. And the red insect is the most harmless and famous.
1. Make a starting square for further folding the paper. Use single-sided paper, in the process we will show the back white side of the paper, a thin strip will become the insect's head. This is the easiest folding option. 2. Now unfold the square in front of you in the form of a diamond. Turn the red side towards you. Look at the photo of the model of the first fold. Fold the top corner towards you about the center of the two sides. Draw your finger along the fold to make the paper remember this position. 3. Now you will see the white side of the paper - in front of you there will be a white triangle superimposed on the red part. Lift the corner up and press the fold. But do not join the corner with the top side (the place of the previous fold), go to about the middle. 4. Next, lower the top bar down towards you so that the paper in this place is folded several times, and also to clearly hide a small corner. This is about half of the assembly work. 5. While holding the top white strip in the folded position, bend the two side corners away from you. Bend one side at a certain angle, then the other. Focus on the photo to make the folds correctly, leave a white strip of the required length. 6. Bend the sides additionally so that the overall figure is rounded, but still remains oblong. Now you can bend the insect in half lengthwise to show the wings (this will be an imitation of them). 7. The insect is almost done. We made an origami paper figure. But you can also make drawn fragments that will definitely show that it is a ladybug in front of us. Use black pigment - a marker or pen. Draw specks on the wings, and also make eyes on a white background. Children know to count the dots to find out how old the bug is. How old is your miniature creation? Now you can definitely plant a bug of your own production on a flower pot or on a leaf of a plant. So easy and simple, without too much difficulty, we got it. We also recommend
|