A fork for braiding the cord with your own hands. Cords (different ways)
Cords ( different ways)
Knitting a round cord on the simplest device.
My grandmother made this device herself: she drove four studs into a wooden coil (up to about the middle) and removed the loops with a needle. Now there are more aesthetic devices for this, they, as a rule,
larger than the coil, they themselves different sizes, "carnations" on them happen different amount, and we are offered to remove the loops with a knitting needle or crochet.
And this is one of mine, it is larger, it is no longer laces that are woven on it, but quite a lace, suitable for bag handles
This is how it is done.
A thread is pulled into the hole of the super-device
All the studs are twisted with a thread so that the working thread remains outside
The loop on the carnation is captured (with a needle, knitting needle, crochet - whichever is more convenient for anyone) so that the working thread is above it. We throw the eyelet over the stud and through the working thread into the inside of the coil, so that the working thread forms a new eyelet on the stud.
We knit all the loops in a circle until…. to the desired cord length
We finish by simply dropping off all the loops and tightening the working thread.
Faceted multicolor cord... You can use 4 colors, you can use 2, or you can make it solid.
Claims for the size and quality of the scan - not for me Pictures are quite understandable, but with excellent vision, even the text can be disassembled
Simple faceted crochet cord(from some Chinese magazine)
More complex crochet cords
1.
Run 2 c. etc., without tightening the initial loop. Insert the hook into the initial loop of the chain and knit st. b / n, insert the hook under 2 threads located from the bottom to the right, grab the thread and, turning to the left, pull through 2 loops on the hook, then grabbing the thread again, knit 2 loops, that is, the b / n column, turning the cord from myself. Re-insert the hook under 2 loops from the bottom right and knit st. b / n, turning
cord. Next, knit art. b / n, introducing a hook under 2 threads from the bottom to the right with a turn of the cord away from you. Knit loosely without tightening.
2. Another crochet cord
Hollow round cord with knitting needles
Collect the required number of loops. Knit 1 row. Remove the loops from the knitting needle, fold in half - the edges of the rows on the right, fold on the left. We put on a knitting needle 1 loop from the first half (which is closer to you), the second from
second. And so on until last loop... We knit the 1st row: persons., Remove the thread in front of the loop from the inside. 2nd row the same. At the end of the work, you will get a cord tied in a circular way. (taken from here)
Twisted lace
1.Take two threads, twist tightly together, fasten the ends with knots.
Disadvantages: The curl is not embossed and can easily unravel
Such a cord is called filigree, and for better fastening, a metallized thread is added to it - it holds the cord in a twisted state.
2.Fasten one edge of the thread, move away (holding the second edge in your hands) the entire length of the thread so that it is taut, and start twisting the thread strictly in one direction. Twist until the twist is evenly distributed over the entire length of the thread. After that, intercept the thread in the middle and, holding the middle tightly, combine both ends of the thread (the one that was in the hand with the previously fixed one) and release it. The thread itself will twist into a beautiful, even and embossed twisted lace.
The options are:
a) one end of the thread is not fixed, but another person holds it in his hands, and then they both twist the thread (both, facing each other, twist it to the right, or both to the left). It turns out faster and more evenly. Then one of them (or even someone else) intercepts the thread in the middle, and they converge and align their ends of the threads;
b) if you need a rather short lace, then you can also not fix the end of the thread, but just take it in your other hand and stretch the thread. But then the hands have to twist the thread in different directions, and this is already a skill,
requiring training. And then you have to intercept the thread in the middle with your teeth;
c) if you need a very long lace, or if you are too lazy to twist it yourself, you can fix one end, and make a loop on the second and adapt this loop either to a mixer or to a drill. We turn on the tool by pulling the thread, and - the technique works for us! Then we release the loop, while keeping the thread taut, intercept it in the middle, align the ends of the threads and let the lace twist
And since such a twisted cord is often decorated with a tassel or pom-pom, we will immediately learn how to make brushes and pom-poms correctly and quickly.
Weaving braid on planks
Flat ornamental cords. This picture gives an idea of the process.
And this one - oh possible outcomes
Weaving a lace using the Kumihimo technique
It’s strange: my grandmother didn’t know about any kumihim, but she wove such laces And not only she ... And it was called "the technique of weaving on a cogwheel" ... And the middle of this wheel did not rotate, like these Japanese, to show us, unreasonable, where exactly to throw the next thread ...
Such "wheels" can be made by ourselves from thick cardboard. To do this, you need to take a circle with a diameter of about 10 cm and make a hole with a diameter of about 1 cm in the middle. The edges of the hole should be smooth so that the threads do not catch. Triangular notches should be made along the edge of the disc. Usually they do 32,. (Figure 1), but for a start, you can do with 16.
The simplest cord is made of 4 strands. For a start, it is more convenient to take 4 different colors... The same cord can be knitted from 2 colors of threads. There are two options: either monochrome threads in the starting position are located side by side, or opposite. The threads on one side must be tied into a bundle and this knot must be lowered into the hole. The ends of the threads are threaded through the notches so that a cross is obtained, and the threads are taut. Now it actually starts
weaving. We hold the disk with one hand, with the other hand we shift the threads according to scheme 2.
For simplicity, the circuit is usually written as in Fig. 3
Loop cord It is also woven from thick enough threads
Simple option
Difficult option
This second option comes out differently from two sides:
Simple two-tone cord
Fasten 2 dark threads and 2 light threads of the same thickness to a stationary object. Place the threads in the following order: one dark at the back, the second dark at the front; one light on the left, the second light
on right.
Swap dark nii with each other (intertwine) from right to left.
BETWEEN the dark threads, one of which is behind and the other in front, twist the light threads from left to right.
Continue weaving, making sure that the dark threads twist all the time
BETWEEN the light ones from right to left (counterclockwise), and the light ones -
BETWEEN the dark ones from left to right (clockwise).
If you need to braid a length of cord, it is better to start braiding from the middle. Fasten the threads in the middle and weave one half. Then turn the cord and weave it the other way.
Here is a sample of the cord, now woven by me from shoe laces and photographed by the phone
Fingerloop cords
A very old way of weaving, which was woven throughout medieval Europe.
In Russia, such shuras were called "Derganians". This technique is used to weave
the most varied and the most varied single or multi-colored cords.
Braid cord
Aiguillette cord
Knotted cord
The main knot of this weaving is very simple, and those who are familiar with macrame know it as a "rep knot", "brid knot" or simply a brid.
We tie several (at least three) threads into a knot. We fix it on something. The threads can be as one - so different colors (but then you need to remember in what order the colors go). We take the extreme thread on the right and
we tie a knot with it on the thread following it, which must be pulled (in the figure - we tie a knot on a blue thread with a red thread). Then we also tie this (red) thread on the next thread, then on the next, etc. This is how the first row turned out:
Now we take the thread from the same side from which we took the red one (the red itself is now with us, after passing the row it spoke on the opposite side) and knit the next row with it:
We "nail" the second row to the first so that there is no gap between them, and ... weave the next row:
Here's what happens after a few rows:
In fact, there are many options for a bridal knot in this technique, and amazing patterns and ornaments are born from their combinations, for example
Braid Cord Options(from the book "The Complete Encyclopedia of Women's Handicrafts", v.2)
A simple braid of three strands is known to everyone, and these weaving patterns are more complex braids
Weaving pattern of four strands
Weaving patterns from five strands
1. First way
2. The second method (we already know it as aiguillette cord)
3. Third way
[Weaving patterns of six strands
1. First way
2. Second way
Seven strand cord
Fasten with pins on the pillow 7 threads 40-50 cm long and divide them into 2 parts - on the left one more - with it and start. Put the extreme thread of the left side on 3 adjacent ones and attach it as an additional one to the right. Then place the extreme thread of the right side on top of the other three. Continue weaving, each time placing the outermost thread over the three adjacent ones.
Lotus cord
It is so called because it is woven with one of the many types of Chinese knot, namely, the knot that is commonly called the "lotus"
Lay crosswise 2, fix them with something at the intersection. You now have 4 ends: bottom (1st and 2nd), top (3rd and 4th).
Loop the 1st end over the 2nd.
2nd end - on 1st and 3rd.
3rd end - on 2nd and 4th.
The 4th end is on the 3rd and pass under the 1st into the loop.
Tighten the knot by pulling on all ends at the same time.
Continue braiding in the same direction (right to left, counterclockwise) and you will have a round, curly cord.
Knots can be tied both clockwise and counterclockwise. If you alternate these directions, you get a cord not with a round, but with a square section. You can weave a lotus cord from 4 different threads
colors.
By the way, other cords are woven according to the same principle: from 3 or 5 ends, as well as a "crown cord" of 8 threads (for this, 4 threads are laid crosswise and fastened in the middle). Here is the diagram " crown cord"
Checker cord
1. Simple chess.
The picture shows weaving of two colors of threads to make it easier to orientate in the weaving. But such a cord, woven from monochromatic threads, looks more spectacular.
2. Difficult chess... In this figure, multi-colored threads are also shown only to simplify the reading of the diagram.
Lace-chain(also called "snake")
This lace is well known to lovers of macrame, because it weaves in alternating "tatting knots". Of course, fans of tatting this knot and such a lace are also very familiar
Secure two threads (same or different colors). Pull with your left hand
left thread, right hand take the right thread and loop around
left thread as shown in the figure. Tighten the working (yellow), when
this nodular (blue) should be taut.
Now pull the right thread with your right hand, and with your left take the left and
loop around the right one. Tighten the working thread (which is now
blue), while not forgetting to pull the nodular (yellow).
Continue to alternate left and right knots until you get the lace you want and this is what you get.
Snake Knot Lanyard(from "snake knots")
Fasten two threads and with the right thread make a loop around the left one, and then with the left thread make a loop around the right one. Tighten the knot, but not tightly.
Extend the loop from the left thread slightly. Make a loop with the right one, as shown in fig. 4, threading the end into the loop from the left.
Pull up the loop - now from the right thread + two loops have formed, passing through the knot.
Flip the weave - the threads are now reversed. Take it right,
pass it under the left, around it and into the second loop formed
the second thread.
Tighten the knots and turn the braid over.
Continue tying the knots by turning the weave and bringing the right thread under the left thread, around it, and in bottom loop.
And you will get such beauty
Macrame "flat knot" cords
For a flat knot, fold the two strands in half and secure.
4 ends formed. The two outermost threads will be working, and the two middle ones will
base, "core", flat knot.
We take the extreme left a thread
and we wind it to the right at a right angle, on top of two non-working threads.
On the left we have a loop. Now we take the rightmost thread,
cover the left thread with it, and wind it to the left under the two middle
with non-working threads, and then thread it from the bottom up into a loop,
formed by the left thread.
We tighten the knot by the working threads, holding the non-working ones.
And so we got it left single flat knot (middle picture).
We repeat all over again - and now we have two left flat knots (right figure)
And if we continue this simple operation further, then we get a twisted cord made of left flat knots.
But if you start a node with right threads and perform the same actions in a mirror, then we get right single flat knot. And a twisted cord tied with such knots will twist to the right... Here it is in the photo - a lace from the right knots (and the lace from the left ones looks mirrored)
But what will the lace look like if, when weaving it, the right and left knots are alternated?
Right! It will not be twisted, but flat, like this
Cords (different ways)Knitting a round cord on the simplest device.
My grandmother made this device herself: she drove four studs into a wooden coil (up to about the middle) and removed the loops with a needle. Now there are more aesthetic devices for this, they, as a rule,
larger coils, they themselves are of different sizes, there are different numbers of "studs" on them, and we are offered to remove the loops with a knitting needle or crochet.
And this is one of mine, it is larger, it is no longer laces that are woven on it, but quite a lace, suitable for bag handles
This is how it is done.
A thread is pulled into the hole of the super-device 
All the studs are twisted with a thread so that the working thread remains outside 

The loop on the carnation is captured (with a needle, knitting needle, crochet - whichever is more convenient for anyone) so that the working thread is above it. We throw the eyelet over the stud and through the working thread into the inside of the coil, so that the working thread forms a new eyelet on the stud.

We knit all the loops in a circle up to ... until the desired length of the cord ![]()
We finish by simply dropping off all the loops and tightening the working thread.
Faceted multicolor cord... You can use 4 colors, you can use 2, or you can make it solid.
Claims for the size and quality of the scan - not for me Pictures are quite understandable, but with excellent vision, even the text can be disassembled

Simple faceted crochet cord(from some Chinese magazine)

More complex crochet cords
1.
Run 2 c. etc., without tightening the initial loop. Insert the hook into the initial loop of the chain and knit st. b / n, insert the hook under 2 threads located from the bottom to the right, grab the thread and, turning to the left, pull through 2 loops on the hook, then grabbing the thread again, knit 2 loops, that is, the b / n column, turning the cord from myself. Re-insert the hook under 2 loops from the bottom right and knit st. b / n, turning
cord. Next, knit art. b / n, introducing a hook under 2 threads from the bottom to the right with a turn of the cord away from you. Knit loosely without tightening.
2. Another crochet cord 
Hollow round cord with knitting needles
Collect the required number of loops. Knit 1 row. Remove the loops from the knitting needle, fold in half - the edges of the rows on the right, fold on the left. We put on a knitting needle 1 loop from the first half (which is closer to you), the second from
second. And so on until the last loop. We knit the 1st row: persons., Remove the thread in front of the loop from the inside. 2nd row the same. At the end of the work, you will get a cord tied in a circular way. (taken from here)
Twisted lace
1.Take two threads, twist tightly together, fasten the ends with knots.
Disadvantages: The curl is not embossed and can easily unravel
Such a cord is called filigree, and for better fastening, a metallized thread is added to it - it holds the cord in a twisted state.
2.Fasten one edge of the thread, move away (holding the second edge in your hands) the entire length of the thread so that it is taut, and start twisting the thread strictly in one direction. Twist until the twist is evenly distributed over the entire length of the thread. After that, intercept the thread in the middle and, holding the middle tightly, combine both ends of the thread (the one that was in the hand with the previously fixed one) and release it. The thread itself will twist into a beautiful, even and embossed twisted lace.
The options are:
a) one end of the thread is not fixed, but another person holds it in his hands, and then they both twist the thread (both, facing each other, twist it to the right, or both to the left). It turns out faster and more evenly. Then one of them (or even someone else) intercepts the thread in the middle, and they converge and align their ends of the threads;
B) if you need a rather short lace, then you can also not fix the end of the thread, but just take it in your other hand and stretch the thread. But then the hands have to twist the thread in different directions, and this is already a skill,
requiring training. And then you have to intercept the thread in the middle with your teeth;
C) if you need a very long lace, or if you are too lazy to twist it yourself, you can fix one end, and make a loop on the second and adapt this loop either to a mixer or to a drill. We turn on the tool by pulling the thread, and - the technique works for us! Then we release the loop, while keeping the thread taut, intercept it in the middle, align the ends of the threads and let the lace twist
And since such a twisted cord is often decorated with a tassel or pom-pom, we will immediately learn how to make brushes and pom-poms correctly and quickly.


Weaving braid on planks
Flat ornamental cords. This picture gives an idea of the process.
And this one is about possible results.
Weaving a lace using the Kumihimo technique

It’s strange: my grandmother didn’t know about any kumihim, but she wove such laces And not only she ... And it was called "the technique of weaving on a cogwheel" ... And the middle of this wheel did not rotate, like these Japanese people did, to show us, unreasonable, where exactly to throw the next thread ...
Such "wheels" can be made by ourselves from thick cardboard. To do this, you need to take a circle with a diameter of about 10 cm and make a hole with a diameter of about 1 cm in the middle. The edges of the hole should be smooth so that the threads do not catch. Triangular notches should be made along the edge of the disc. Usually they do 32,. (Figure 1), but for a start, you can do with 16.
The simplest cord is made of 4 strands. For a start, it is more convenient to take 4 different colors. The same cord can be knitted from 2 colors of threads. There are two options: either monochrome threads in the starting position are located side by side, or opposite. The threads on one side must be tied into a bundle and this knot must be lowered into the hole. The ends of the threads are threaded through the notches so that a cross is obtained, and the threads are taut. Now it actually starts
weaving. We hold the disk with one hand, with the other hand we shift the threads according to scheme 2.
For simplicity, the circuit is usually written as in Fig. 3
Loop cord It is also woven from thick enough threads
Simple option

Difficult option

This second option comes out differently from two sides:


Simple two-tone cord
Fasten 2 dark threads and 2 light threads of the same thickness to a stationary object. Place the threads in the following order: one dark at the back, the second dark at the front; one light on the left, the second light
on right.
Swap dark nii with each other (intertwine) from right to left.
BETWEEN the dark threads, one of which is behind and the other in front, twist the light threads from left to right.
Continue weaving, making sure that the dark threads twist all the time
BETWEEN the light ones from right to left (counterclockwise), and the light ones -
BETWEEN the dark ones from left to right (clockwise).
If you need to braid a length of cord, it is better to start braiding from the middle. Fasten the threads in the middle and weave one half. Then turn the cord and weave it the other way.
Here is a sample of the cord, now woven by me from shoe laces and photographed by the phone

Fingerloop cords
A very old way of weaving, which was woven throughout medieval Europe.
In Russia, such shuras were called "Derganians". This technique is used to weave
the most varied and the most varied single or multi-colored cords.


Braid cord

Aiguillette cord

Knotted cord
The main knot of this weaving is very simple, and those who are familiar with macrame know it as a "rep knot", "brid knot" or simply a brid.
We tie several (at least three) threads into a knot. We fix it on something. The threads can be as one - so different colors (but then you need to remember in what order the colors go). We take the extreme thread on the right and
we tie a knot with it on the thread following it, which must be pulled (in the figure - we tie a knot on a blue thread with a red thread). Then we also tie this (red) thread on the next thread, then on the next, etc. This is how the first row turned out:
Now we take the thread from the same side from which we took the red one (the red itself is now with us, after passing the row it spoke on the opposite side) and knit the next row with it:
We "nail" the second row to the first, so that there is no gap between them, and ... weave the next row:
Here's what happens after a few rows:
In fact, there are many options for a bridal knot in this technique, and amazing patterns and ornaments are born from their combinations, for example
Braid Cord Options(from the book "The Complete Encyclopedia of Women's Handicrafts", v.2)
A simple braid of three strands is known to everyone, and these are patterns for weaving more complex braids
Weaving pattern of four strands

Weaving patterns from five strands
1. First way

2. The second method (we already know it as aiguillette cord)
3. Third way 
[Weaving patterns of six strands
1. First way 
2. Second way 
Seven strand cord
Fasten with pins on the pillow 7 threads 40-50 cm long and divide them into 2 parts - on the left one more - with it and start. Put the extreme thread of the left side on 3 adjacent ones and attach it as an additional one to the right. Then place the extreme thread of the right side on top of the other three. Continue weaving, each time placing the outermost thread over the three adjacent ones.

Lotus cord
It is so called because it is woven with one of the many types of Chinese knot, namely, the knot that is commonly called the "lotus"
Lay crosswise 2, fix them with something at the intersection. You now have 4 ends: bottom (1st and 2nd), top (3rd and 4th).
Loop the 1st end over the 2nd.
2nd end - on 1st and 3rd.
3rd end - on 2nd and 4th.
The 4th end is on the 3rd and pass under the 1st into the loop.
Tighten the knot by pulling on all ends at the same time. 
Continue braiding in the same direction (right to left, counterclockwise) and you will have a round, curly cord.
Knots can be tied both clockwise and counterclockwise. If you alternate these directions, you get a cord not with a round, but with a square section. You can weave a lotus cord from 4 different threads
colors.
By the way, other cords are woven according to the same principle: from 3 or 5 ends, as well as a "crown cord" of 8 threads (for this, 4 threads are laid crosswise and fastened in the middle). Here is the diagram " crown cord"

Checker cord
1. Simple chess.
The picture shows weaving of two colors of threads to make it easier to orientate in the weaving. But such a cord, woven from monochromatic threads, looks more spectacular. 
2. Difficult chess... In this figure, multi-colored threads are also shown only to simplify the reading of the diagram. 
Lace-chain(also called "snake")
This lace is well known to lovers of macrame, because it weaves in alternating "tatting knots". Of course, fans of tatting this knot and such a lace are also very familiar
Secure two threads (same or different colors). Pull with your left hand
left thread, take the right thread with your right hand and twist around
left thread as shown in the figure. Tighten the working (yellow), when
this nodular (blue) should be taut.
Now pull the right thread with your right hand, and with your left take the left and
loop around the right one. Tighten the working thread (which is now
blue), while not forgetting to pull the nodular (yellow).
Continue to alternate left and right knots until you get the lace you want and this is what you get.
Snake Knot Lanyard(from "snake knots")
Fasten two threads and with the right thread make a loop around the left one, and then with the left thread make a loop around the right one. Tighten the knot, but not tightly.
Extend the loop from the left thread slightly. Make a loop with the right one, as shown in fig. 4, threading the end into the loop from the left.
Pull up the loop - now from the right thread + two loops have formed, passing through the knot.
Flip the weave - the threads are now reversed. Take it right,
pass it under the left, around it and into the second loop formed
the second thread.
Tighten the knots and turn the braid over.
Continue tying the knots by inverting the weave and bringing the right thread under the left thread, around it, and into the bottom loop.
And you will get such beauty
Macrame "flat knot" cords
For a flat knot, fold the two strands in half and secure.
4 ends formed. The two outermost threads will be working, and the two middle ones will
base, "core", flat knot.
We take the extreme left a thread
and we wind it to the right at a right angle, on top of two non-working threads.
On the left we have a loop. Now we take the rightmost thread,
cover the left thread with it, and wind it to the left under the two middle
with non-working threads, and then thread it from the bottom up into a loop,
formed by the left thread.
We tighten the knot by the working threads, holding the non-working ones.
And so we got it left single flat knot (middle picture).
We repeat all over again - and now we have two left flat knots (right figure)
And if we continue this simple operation further, then we get a twisted cord made of left flat knots.
But if you start a node with right threads and perform the same actions in a mirror, then we get right single flat knot. And a twisted cord tied with such knots will twist to the right... Here it is in the photo - a lace from the right knots (and the lace from the left ones looks mirrored)
But what will the lace look like if, when weaving it, the right and left knots are alternated?
Right! It will not be twisted, but flat, like this
Decorative cord "Josephine"
The cord is very decorative. For weaving it, it is advisable to use
a sufficiently thick and stiff thread. It is more convenient to weave it not by weight, but by
some kind of plane.
1. Cord "Josephine" with one end of the thread.
2.Cord "Josephine" with two ends of the thread(or two threads of different colors)
Cord with a life-affirming title "The Hanged Man's Knot".
We thread the thread into the hole to which it will be attached in the future
cord, we leave about a quarter of the length motionless, and the rest
fold the segment with a loop

Having folded three layers of a fixed thread, we begin to wind the long end around them in turns.

We impose even and dense turns. As soon as the length was calculated
sufficient, thread the movable end of the thread into the formed loop and
tighten with the second end.


This cord can be easily unraveled as needed by simply pulling on the desired end of the thread.
Cord braid
Dea threads are tied in such a way that there are three short ends, equal in length, and one is much longer than the rest.

We leave the three short ends of the thread motionless, and the long one will be with us
slider. The long end is woven between the three short ones in a checkerboard pattern.
order, for example from left to right.

Having reached the extreme right end of the cord, we also weave in a checkerboard pattern from right to left.

So weave to the desired length
You can make the tape wider by using three cords instead of two. And if you need a cord
long, it is more convenient to weave from the middle: first in one direction, then in
another.
Round two-tone cord
It is woven from 8 threads, four of each color.
Fix the ends of the threads and arrange them according to the scheme: 4 threads of one (white) color on the right, four threads of the other (black) on the left.
Start weaving from the leftmost (black) thread. After doing what
drawn on the diagram, repeat, starting with the thread (black), which is now
turned out to be the leftmost.
 Accordion cord
You can weave it from one thread, you can from two threads of one or different
colors. For clarity, the picture shows the weaving of such a cord from
strips of paper.

Fold the ends of the thread at an angle of 45 *. The end of the thread at the bottom
bend and lay on the upper one. Now the other end of the thread is at the bottom,
bend it too and put it on top. And so repeat until you receive
"accordions" of the required length.
Braided cord
It resembles a flat-knot macrame cord, but looks
differently. It is woven from any number of threads, because workers are
only two extreme, and in the middle of the threads there can be as many as you like.

First thread 1 is wound under the middle threads, and then thread 2 (b, c).
Then thread 1 is laid on top of the middle ones, pulled from above with thread 2 (d)
and folded in the opposite direction over the middle (e). Already on another
to the side of the thread 1 again pull the thread 2 (e). In the same
the rest of the weaving is carried out in the sequence (g, h). Finished Width
cord depends on the number of medium threads.
Cord "Nibbler"
It is woven with four threads or two, folded in half. What is good - it does not stretch at all. And just beautiful

They begin to weave like a regular braid of four strands, but after the first
four movements (a-d) begin to form denticles. Right end of thread
2 is pushed into the weave, bend around the thread 2 on the left and
output over thread 1 (d, f). In turn, thread 2 located
on the left, pushed into the weaving and taken out on the right (g). As a result of these
operations, the second clove is formed. Getting started with the formation of the third
clove, the thread 2 brought out on the right is bent around the thread 1 (h). Everything
further operations to form the remaining teeth are similar
previous.
Cord "Butterfly"
In our collection there is already a very similar one, but they are woven a little differently.


At Fedyukhin's Heights, this is not only a spectacular reconstruction of battles, but also a colorfully recreated atmosphere of different historical eras. We met those who know how they handled and what our ancestors played.
Weaving on the reed
A craftswoman named Arina is weaving on the reed.
The reed can replace the loom. With his help, women made belts, eyelashes, towels, tablecloths. This is a small wooden plank with slots and holes for the threads to pass through. “We move the reed up: the threads threaded through the holes remain motionless, in the slots they can move. In this case, a pharynx is formed - such an interval between the threads. A separate thread is threaded through this throat, ”explains the girl. This is how the fabric is created.


Knitting with a wooden needle
This technique in Russia was called "digging". Products tied with a wooden needle cannot be loosened.
“There are about thirty ways to knit with such a needle,” says Arina. "But there are about five popular types." They knitted mainly small items - socks and mittens: the knitting process itself is quite long and takes a lot of time. Arina even boasted about a pair of knitted socks: "This is for me for the winter!" Indeed, the products are very dense.


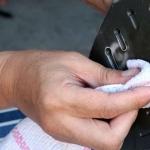
Weaving laces on a fork
This technique is carried out using a special wooden fork and yarn. As a result of simple shenanigans, a fairly strong lace is obtained.

Making candles from foundation
A smiling girl named Olga is engaged in candle making.
Waffle-like sheets are called foundation. These are empty honeycombs.
“A thread and foundation are taken. The thread is placed on the edge of the sheet, tightly applied and rolled. Nothing complicated, ”said the girl.
By the way, wax candles are the ancestors of all candles. In addition, they have a beneficial effect on the body: wax evaporates and releases useful substances.


The game "Mancala"
A guy named Aleksey told the rules: “You need to put four pebbles in each hole. There are six of my holes and six of my opponent. To determine who goes first, roll the dice. We play in turn. I go first: I take balls from any of my holes and put them one at a time in the other holes counterclockwise. If, in laying out pebbles, I reach my kalakh (this is a separate side hole), I put one pebble in it. No stones are placed in the opponent's feces: we skip it and put it on. The game counts. " If the number of balls leads the player to the hole from which the game began, it must be skipped by continuing the layout into the next holes. The goal of the game is to move as many pebbles as possible in your feces. The game ends as soon as all six holes on one side of the board are empty.
At first glance, the rules may seem too confusing, but once you start playing, everything immediately becomes clear and simple.
We also recommend
 Physical Activity and Health Presentation
 How can you clean your iron at home from scale and carbon deposits
 Project on the topic: "Birthday of the Earth" project (senior, preparatory group) on the topic Material and equipment
 How to clean the iron from burn-on on the sole, scale inside
 If the father does not pay child support: what to do?
 Why do men lie to women?