Dried flowers. Materials, drying and storage.
MATERIALS AND TOOLS
You can find the tools and tools you need to create your dried flower arrangements at every garden center or garden supply store. Alternatively, try looking at flower or hardware stores, or specialized wholesalers. Try to keep materials and tools close at all times so that you do not look for them when you need them, and do not interrupt work because of this, losing inspiration and rhythm.
Knife... A long kitchen knife is used to cut the floristic sponge and shape it into the required shape, and a knife with a retractable replaceable blade is used to cut woody stems at an angle. The knife can also be used to grip the materials to be glued if the glue gun is too hot.
Saw... This useful tool comes in handy when cutting through very tough stems, sawing tree trunks or rather thick branches from which the curly bases of the composition are made.
Nippers... Nippers are required to cut the wire mesh.
Scissors... For flowers, scissors with a serrated inner edge are used to make it easier to cut tough stems such as artichokes. And the finishing tapes are cut with sharp tailor's scissors, which are completely unsuitable for other purposes: if they cut the stems with them, they will become dull faster.
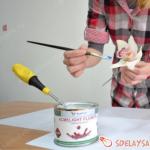
Secateurs... The pruner is a spring-loaded cutter designed for cutting materials of various thicknesses. Pruners are produced in all sizes and shapes. Find a pair of suitable ones that will be comfortable for you to work with. Always hold the secateurs with the blade upward while working. It is better to make two or even three cuts than to forcefully cut the material
Fastening
Wire bonding... The wire is needed to hold the composition together. Coiled wire, which comes in a wide variety of sizes and colors, is used to fasten garlands or moss to the edges of a basket or to a base. Colored wire is often used for hats and can be a decorative element of a project. Remember that the larger the wire number, the thinner it is. Experiment with different wire thicknesses until you find one that works best for you.
Garden thread... To work with dried flowers, you need a riding thread, which is used to tie bouquets to a wreath or garland or pull together the base of a decorative arch. Garden filaments are usually green or brown so they cannot be seen against any dried plants.
Raffia... Raffia, a fiber derived from the sugar juice of raffia wine blossoms, is traditionally used by florists as an attractive bonding material instead of coarser threads or ribbons.
Stalk wrapping tape... This rubber-based tape is wound around the wire. A pendant loop is made of it, it disguises the unattractive ends of the bouquets twisted with wire.
Wire for flower arrangements... Florists use wires of various lengths and thicknesses. It is associated with flower stems and branches with leaves. It is better to use a wire that is more convenient for you to work with: it is not so easy for an inexperienced person to handle it. The thicker the plant material, the thicker the wire connecting it should be. Silver plated wire is used for delicate work.
The foundation
Floral sponge... The floral sponge serves as the basis for many floral arrangements. Flower stems or wire are inserted into it. This sponge is sold in the form of rectangular blanks, balls, cones and cylinders, as well as large blocks. Always try to choose a gray or brown sponge; the green sponge is intended for freshly cut flowers, but it is not suitable for dried flowers, as it crumbles.
Gluing
Glue gun and glue sticks... The trigger glue gun is the most convenient tool for bonding plant material or adding artificial stems in a flower arrangement. In a glue gun, sticks of transparent glue are heated to a very high temperature, and then the glue is squeezed out in a thin stream. The glue gun can overheat, therefore, during prolonged use, it must be turned off periodically and allowed to cool.
Moss and hairpins... In flower arrangements, various types of moss are very often used, which is usually used to cover and mask the frame of the composition, for example, a floral sponge, a wire in a wreath or a base of a garland made of wire mesh. Moss is used to fill in all the gaps in the completed composition.
Coconut moss... This coconut moss is an extremely healthy material as it can be dyed in a wide variety of colors. They can be used to trim the top of the container or use it as a composition element.
Reindeer moss... Reindeer moss can be painted in a wide variety of colors. This moss perfectly masks any flaws in the composition.
Sphagnum moss... No dried flower arranger is complete without sphagnum (peat moss). They are covered with a floral sponge in compositions. It also serves as a wonderful backdrop for wreaths and baskets decorated with garlands.
Moss hairpins... The moss in the composition is pinned to the base, a floral sponge, with special hairpins, which you can buy or make yourself from 22 gauge wire.
Anchoring
Fastening tape... Fastening tapes, narrow and shiny, can be glued to the floral sponge to hold it in place while you work. They can also be used to hold several pieces of floral sponge together.
Candle Holders... The star-shaped base of these plastic fixtures fits easily into the floral sponge, allowing the candle to be held in place. Candle holders are available in a wide variety of sizes.
Flower clay... Flower clay is commonly used to attach plant material to the base. For example, it can be used to secure a candle that is too large for the candle holder.
Stones / gravel... Stones or gravel can be placed in the container to make it more stable. They can also serve as a decorative element of the composition.
Compositions of branches and garlands
Wire mesh... You can find wire mesh in a variety of sizes for twigs and wall arrangements at garden centers or hardware stores. A floral sponge is also wrapped in wire mesh for greater structural strength, allowing it to hold large stems such as artichokes. You can also use plastic coated wire. You will need pliers to twist the mesh.
Nylon fixing plaster... This is a convenient material that allows you to fix fairly thick branches in pots. Plaster can be placed on the bottom of the pots to stabilize the entire composition, which, for example, can fall from a narrow bottom.
Gypsum... Gypsum serves as a good base in which to anchor the ends of fairly thick branches. Cheaper finishing plaster or cement can also be used instead of plaster, but these take longer to cure.
Useful items
Walking sticks, long hairpins and cocktail straws... These items are useful for securing fairly heavy items such as candles and earthen pots. They can also grow the stem.
Transparent sealant... A clear sealant is a very light colored varnish. This transparent retainer is specially designed for dry materials. It retains the color of the paint and even brightens it, and also keeps the plant material clean. To create compositions, you can use the fixative used by artists.
Aerosol paints... Fashion is changing rapidly, so it is useful to have a wide range of aerosol colors for florists to keep up with. At any time, you can give the foliage, flowers or containers you need, as well as change it. coordinate or enhance the original colors.
Rotating table... A rotating stop is useful, although not required. It is much more convenient to work on such a table, since the structure on it is located above the usual work surface.
COLLECTION AND STORAGE OF PLANTS
Keeping your favorite garden plants can be a lot of fun, and using your own dried plant materials makes the compositions unique.
Choose one of the drying methods, which are detailed below. Pick quality materials, cut at the right time, dry and preserve flowers and leaves that will delight you throughout the year.
Collection
The accuracy of determining the moment of collecting plant material comes with experience: some flowers need to be picked at the budding stage, others at the beginning of flowering, and still others at the stage of maturity or when the seeds are ripe. Harvesting is a whole science, so take the time to study it.
Cut back the plant material for storage when it is in full bloom, because the drying process will highlight any flaws in it, and do this in dry weather. Try to dry the plants as quickly as possible.
Air drying
This is the easiest, most natural and cheapest way to dry your plants Do not dry your plants in a greenhouse or winter garden, garage or shed, because they will quickly wither and mold there. It is always a pity for the dead flowers, which I wanted so much to preserve.
Choose bundles of plants with lignified stems like yarrow, cuff, or gypsophila, as they dry faster. than plants with fleshy stems. Use a rubber band to tie the plant stems together. The plant bunches should not be too tight, so as not to obstruct the air flow to the center of the bunch. Hang the bundles on a horizontal rod or wire dry.
ventilated dark room. Remember to start drying the bundles as soon as possible after cutting the plants.
If you have a spacious one. a well-ventilated dryer or dry area (eg above a boiler room), you can hang bunches of plants there. Warm air speeds up the drying process and helps to maintain color. A desiccant can also help remove unwanted moisture from plants.

Open drying
Plants with heavy heads. such as sweet corn and various onions can be dried on a wire mesh rack attached to the frame.
Drying in water
This method allows you to preserve the shape of the stem or flower head better than drying flowers in their original state. Fill the container with cold water to a height of 5 cm. After removing the excess foliage, place the flowers in the water so that they do not touch each other and the air can circulate freely between them. Place the flower container in a dark, dry and well-ventilated area. The water will evaporate and the plants will gradually dry out.
Using glycerin

Glycerin helps preserve the plant rather than dry it. Glycerin, which can be bought in pharmacies, is mainly used to keep foliage supple. Glycerin works well in heather, oak, beech and eucalyptus. Thick, leathery fox plants, like fatsia, are better preserved if they are completely immersed in a preservative solution.
Gather plant material in the middle of summer when the sap is still climbing up the branches. Choose your plants carefully so as not to waste this expensive preparation on damaged stems, the sooner you start drying after cutting, the better, because drooping plants can no longer be restored.
Mix two parts boiling water with one part glycerin and pour the mixture into a narrow container, for tough, leathery leaves a 50:50 mixture is recommended.
Immerse the stem 7 cm in the glycerin. Do not place the plants too tightly, provide them with enough free space. Place the container in a warm, dry place away from other drying plants. Most plants will take about three weeks to dry. If necessary, add the glycerin mixture to the container.
The material processed in this way will be stored for a very long time, remaining flexible and soft. You will see that after treatment the color of the plants will change slightly and an oily bloom will appear on them. The addition of a few drops of food coloring to the glycerin solution will help to change the color scale of the plant.
Using desiccants

A drier is a granular material that absorbs moisture well. Desiccants significantly speed up the drying process of plant material compared to drying in the open air. moreover, they provide the best preservation of the shape and color of the plant. But this is a more complicated and expensive drying method. In addition, with this drying, the stems become very brittle, so they will have to be tied with wire before or after drying.
Quartz gel, which can be purchased at garden centers or shops, is used as a desiccant to dry flowers with very thin petals. such as pansies, zinnias and anemones. This procedure should be carried out slowly.
Take a sturdy box with a lid and pour the quartz gel beads into the bottom. Place flower heads on the wire.
Carefully put the flower heads fixed with wire into the box and pour the granules of quartz gel on top in a thin stream, being careful not to damage the flower petals or flatten them, as the flower should remain voluminous.
Using a soft brush, gently direct the gel granules towards the petals of the plant so that they become a support for the petals. Place the lid on the box.
Leave the plants to dry at approximately 28 degrees. The drying time for each type of plant is different, so periodically, every few days, check the condition of the plant. If the plant material is light and tough, drying is complete. If the plant is too dry, it will have to be replaced, since overdried material is only suitable for perfume.
When the plants are dry, remove them from the desiccant box. If the plants are very delicate, remove them with a soft brush. Transfer the dried flowers to a box with a lid, but don't stack them too tightly (I usually use a cloth) and store in a dry place. Quartz gel can be used many times.
Microwave drying
Microwaves can be used to evaporate moisture from the flower or leaves and speed up the drying process with quartz gel. However, microwave drying without silica gel is ineffective.
Fill the bottom of a microwave safe container with quartz gel and carefully place the flower heads that are not attached to the wire on it. Cover them with a thin layer of quartz gel, being careful not to crinkle the flowers.
Set the average power to 300-350 watts, or if you are sure of the result. start with defrosting mode, about 200 W. Experiment before drying selected plants. Drying times may vary, but generally it takes 2-2.5 minutes per 250 g of plants. Dry gradually, as you can always set an extra time if the plant is not completely dry. I know from my own experience how easy it is to dry out the material. After drying, the plants should sit in the air for about 15-30 minutes before you pack them.
Dried fruits
The fruits should be dried during the ripening period. Oranges, lemons, limes and grapefruits should be chopped (not too thick) and put to dry. Dry them slowly. sometimes turning it over, in a lukewarm oven, on a radiator or in a warm dryer.
Try cutting up a whole tangerine or orange like a flashlight and drying in the same way.
To dry the apples, make a saline solution (for 0.5 liters of 30 g of salt) and soak 8 apple slices with it. Then, string the apple slices onto the raffia and place them in a warm dryer or on top of the boiler room.
Press drying
Press drying is the fastest and most convenient way to preserve flowers. All material must be dry and free from stains. Choose as many flowers as you can handle at one time, as plants will wither quickly.
If you don't have a flower press, use old newspaper or blotting paper. Arrange the flowers on paper and cover them with paper. Then press down on top with a board, heavy rug, or a stack of books.
Leave the flowers on for at least three weeks, then carefully remove and pack them. paving paper into a box. The pressed flowers are very delicate, so they must be protected with self-adhesive foil or glass. Try this on a hellebore, pansies, ivy, or a soft cuff.

Storage
During storage, the flowers must be absolutely dry.
Arrange the dried flowers in a box on napkins, with the heaviest plants on the bottom layer. Place the lid on the box. Be very careful not to break the dried flowers 8 during storage.
Sign the unopened box and place it in a dry, dark place. Be aware of the mice, especially when you intend to preserve dried flaxseeds, wheat ears, and poppy pods. Put naphthalene in a box with dried peonies.
Keep the quartz gel-dried flowers in an airtight container, making sure to label the boxes.
Anne Ballard "Dried Flower Arrangements"
We also recommend
 Which soil to choose for the aquarium - sand, gravel, pebbles, nutritious for plants or black with prices
 When can you transplant flowers
 Unusual flower glowing in the dark
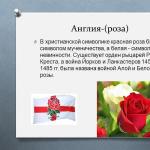 Flowers and plants as symbols of the countries of the world O The presentation was prepared by Victoria Aldokimova Teacher Kostrikova I
 And also several other ways
 Plants symbols of countries